Cherry Pie Bars
This post may contain affiliate links. See our affiliate policy here.


These cherry pie bars have all the taste of cherry pie in an easy-to-make bar. Perfect for sharing at gatherings for dessert, or as a sweet treat for snacking!
Try my Blackberry Pie Bars, Lemon Bars or Sugar Cookie Bars, too!
Step-by-step photos and instructions are below. Jump to the recipe card if you wish!

If you’re a fan of cherry pie (and who isn’t?) you’ve got to try these easy cherry bars. They’re easy to make and pack all the flavor of a traditional pie into a convenient, sharable treat. I say “sharable”, but honestly, no pressure and no judgement!
You only need a handful of ingredients you probably already have in your pantry, which means you can whip them up… today.
I promise, they are quick, easy and delicious! The buttery shortbread crust and crumbly topping pair perfectly with the sweet, tart cherry flavor. Trust me, once you try them, they’ll become a regular on your baking list and a “can I have the recipe” anytime you serve them up on a holiday dessert bar.
Cherry bars are fantastic on their own or served with a dollop of whipped cream or a scoop of vanilla ice cream. They make a great dessert for any occasion!
Cherry pie bars are the party version – but for the easy, nostalgic option, make these peanut butter and jelly bars.
Why you’ll love this
- Simple. Easy to make with basic pantry ingredients.
- Delicious. Full of classic cherry pie flavor in every bite.
- Adaptable. This is a great recipe to make your own. You can swap out the cherry filling for your favorite flavor of filling.
FAQs
Yes, you can use any pie filling like apple, peach or blueberry pie filling.
Yes, wrap them tightly and freeze for up to 3 months. Thaw at room temperature before serving.
Sure! If you need more bars, simply double the ingredients and use a 9×13-inch pan instead of the 8×8 pan. The bake time should remain about the same.
Of course! If you prefer, you can make your own filling. Just be sure it’s thick enough so the bars hold together well.
Step-by-step photos and tips and tricks are below. Jump to the full recipe card instead

Key Recipe Ingredients
Note: This highlights some ingredients. Full list is in the recipe card.
- All-purpose flour. This is the backbone of your bars! It provides the structure for both the crust and the topping. No fancy flour needed here—just your basic all-purpose variety will do the trick.
- Granulated sugar. Adds just the right amount of sweetness to the crust and topping. If you like things less sweet, feel free to dial it back a bit.
- Baking powder. Helps give the dough a little lift, so your bars aren’t too dense. It’s just enough to create a nice, soft texture.
- Butter. I always go for salted butter because it adds a little something extra to the flavor. Make sure it’s softened so it mixes in easily with the dough, giving it that rich, buttery goodness.
- Egg. I use large eggs for baking, and make sure it’s at room temperature so it blends smoothly into the dough. This egg helps bind everything together, so your bars hold their shape.
- Vanilla extract. Just a splash of this adds sweetness and depth to the dough. If you’re feeling adventurous, try almond extract for a slightly different flavor twist! I use vanilla and almond extract in place of each other depending on how I feel that day.
- Canned cherry pie filling. This is what makes these bars extra special! The sweet and tart cherries are the perfect filling, but you can totally swap it out for your favorite fruit filling—think blueberry, apple, or even peach.
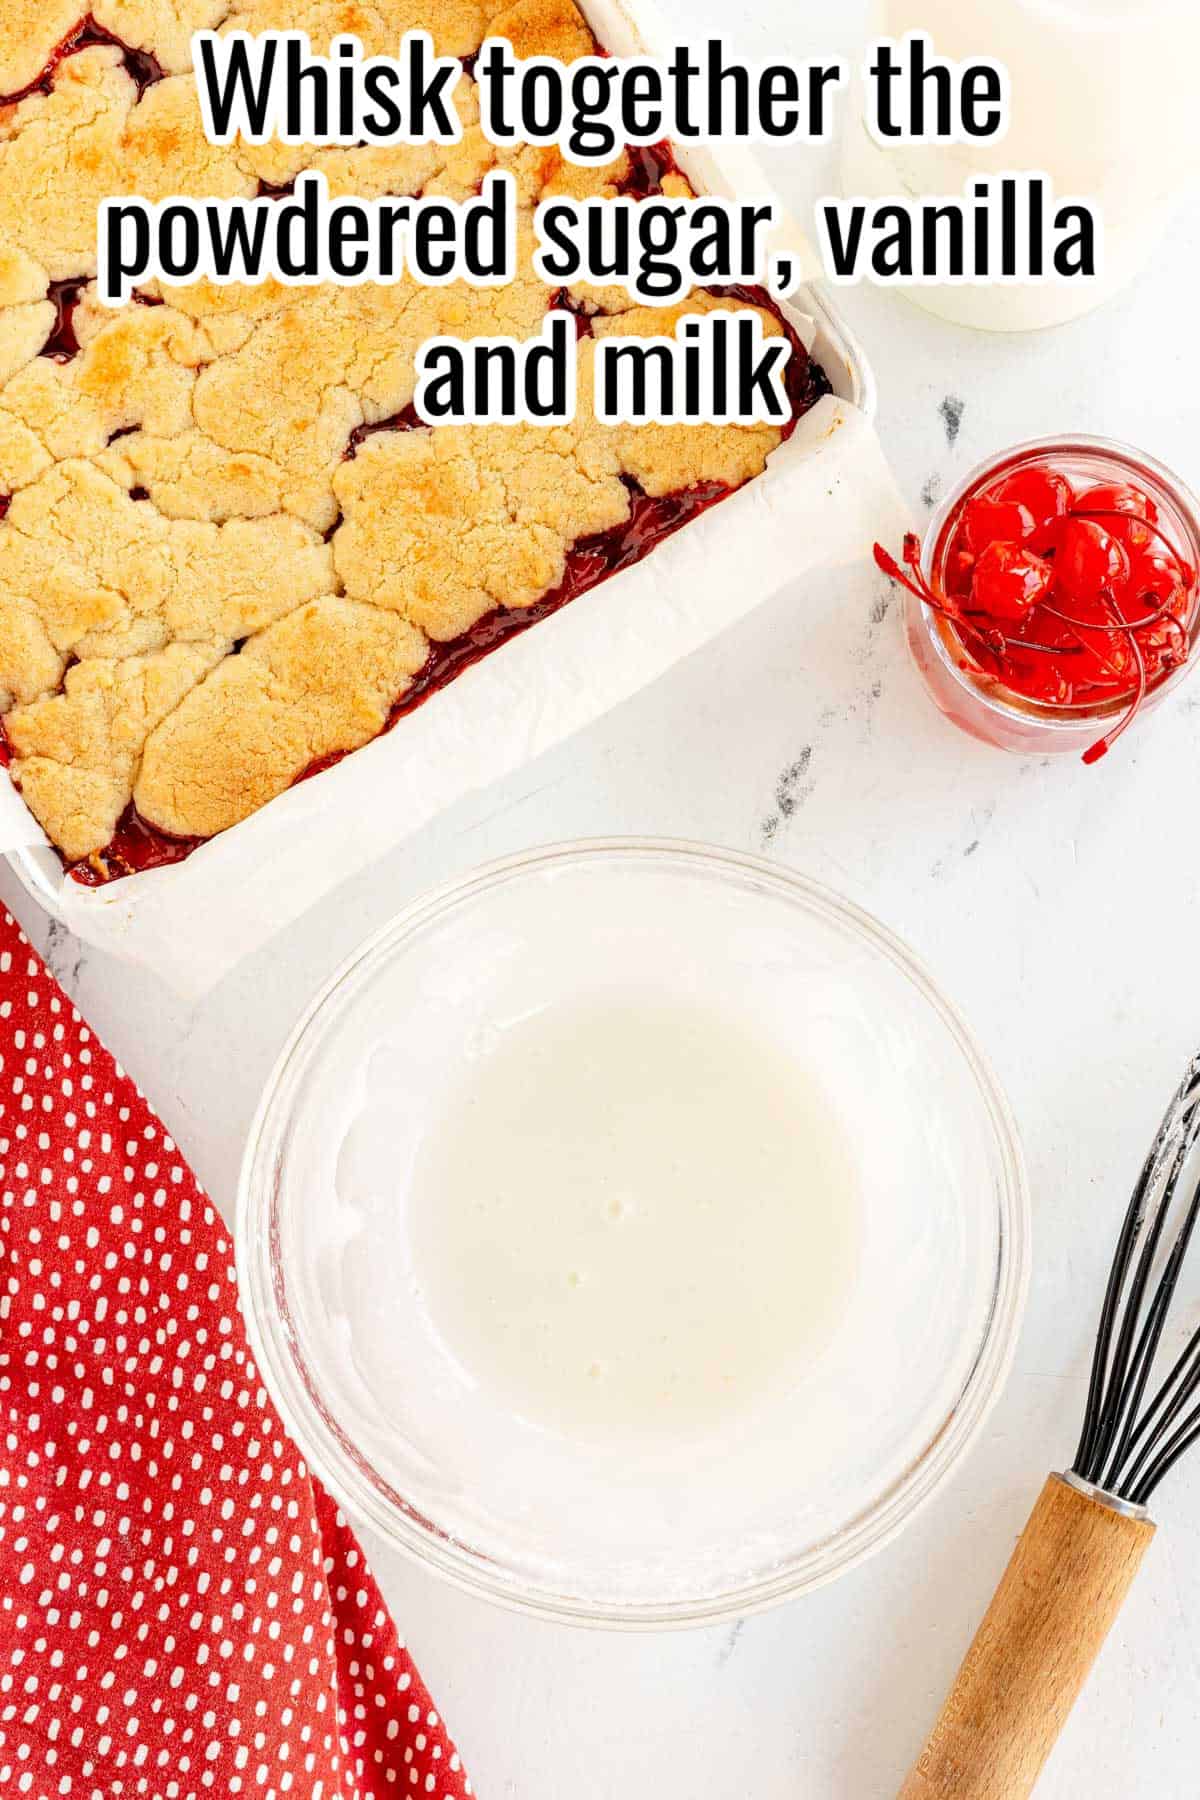
- For the optional glaze: I use powdered sugar, vanilla extract and milk

Would you like to save this recipe?
How to make this recipe
This is a step-by-step photo guide. Full ingredients and instructions are in the printable recipe card below.
JumpGet prepped. Preheat your oven to 350°F (175°C). Line an 8×8-inch baking pan with parchment paper.
Prepare the dough. In a large bowl, mix together the flour, granulated sugar, and baking powder.
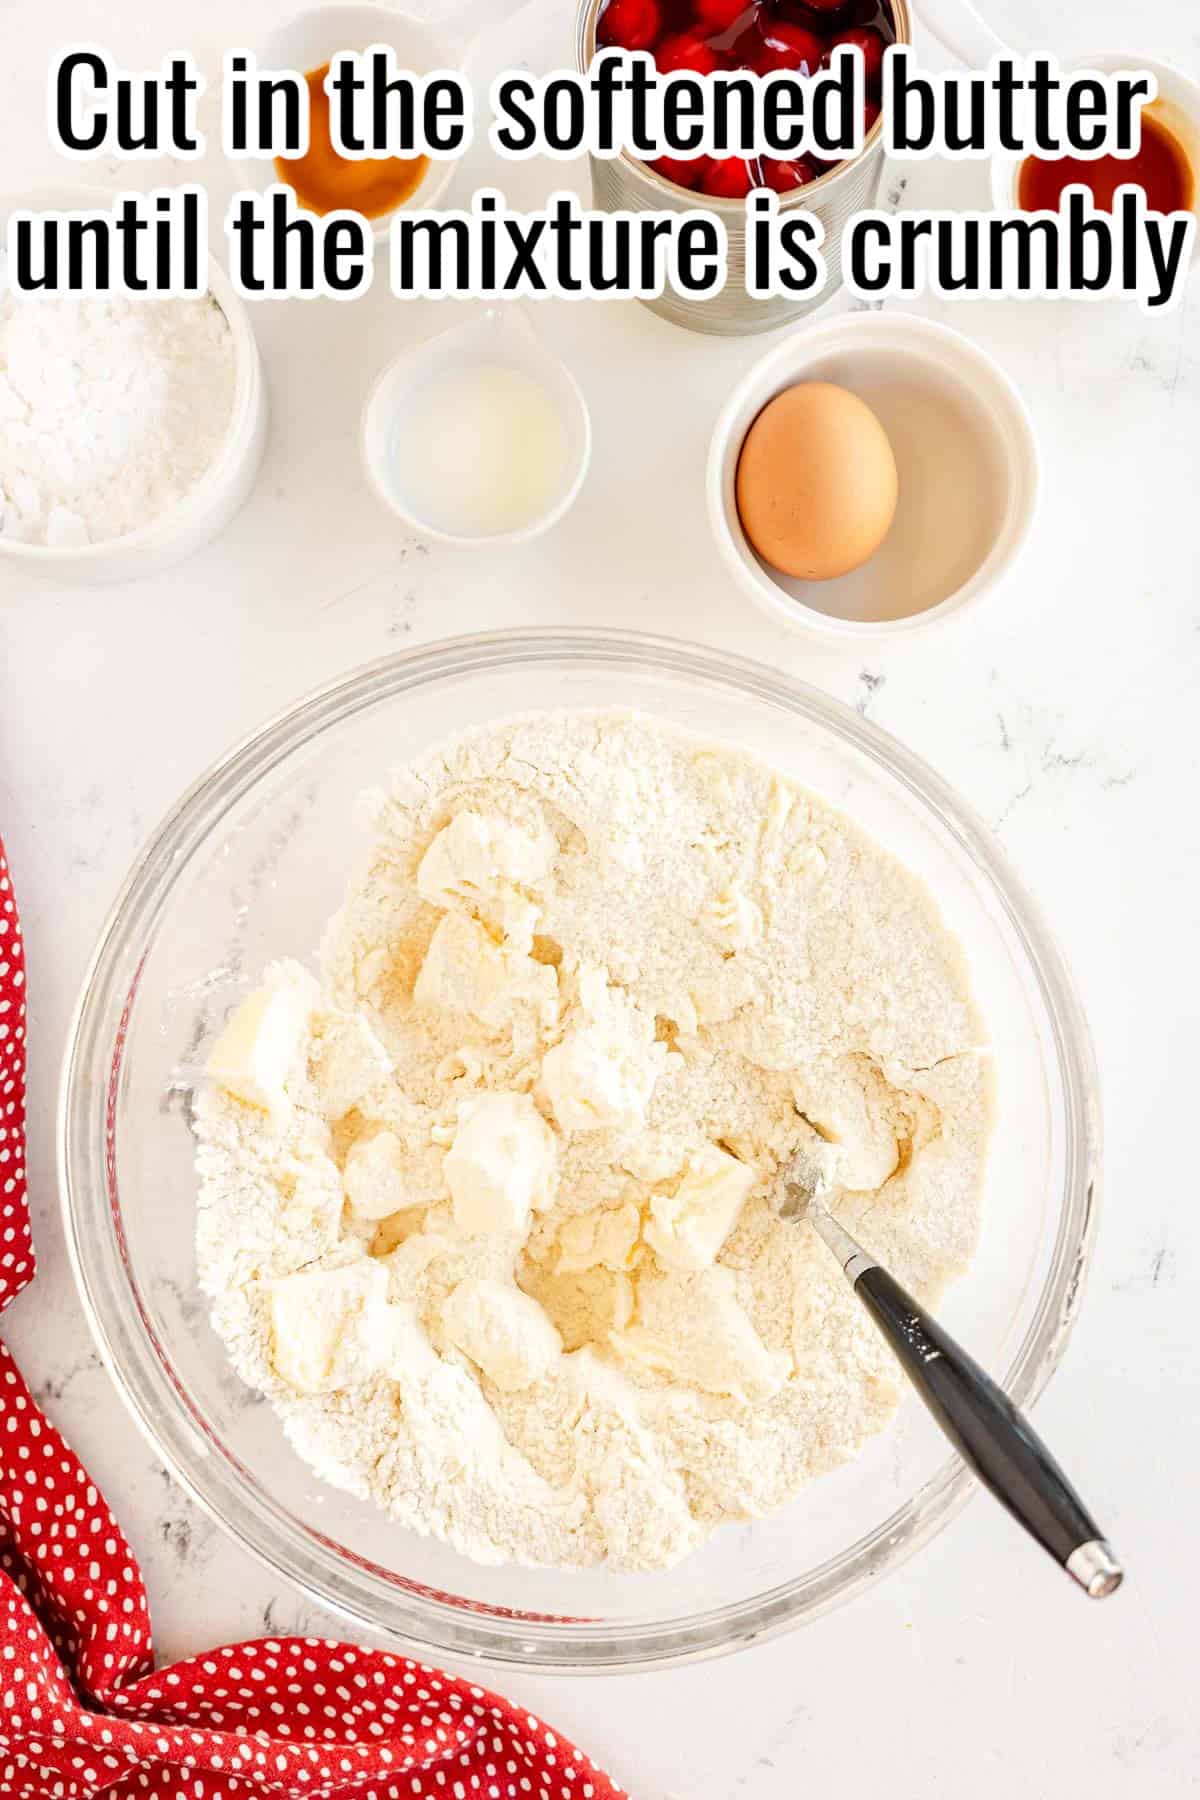
Cut in the softened butter until the mixture is crumbly.
Stir in the egg and vanilla extract until combined.

Assemble the bars
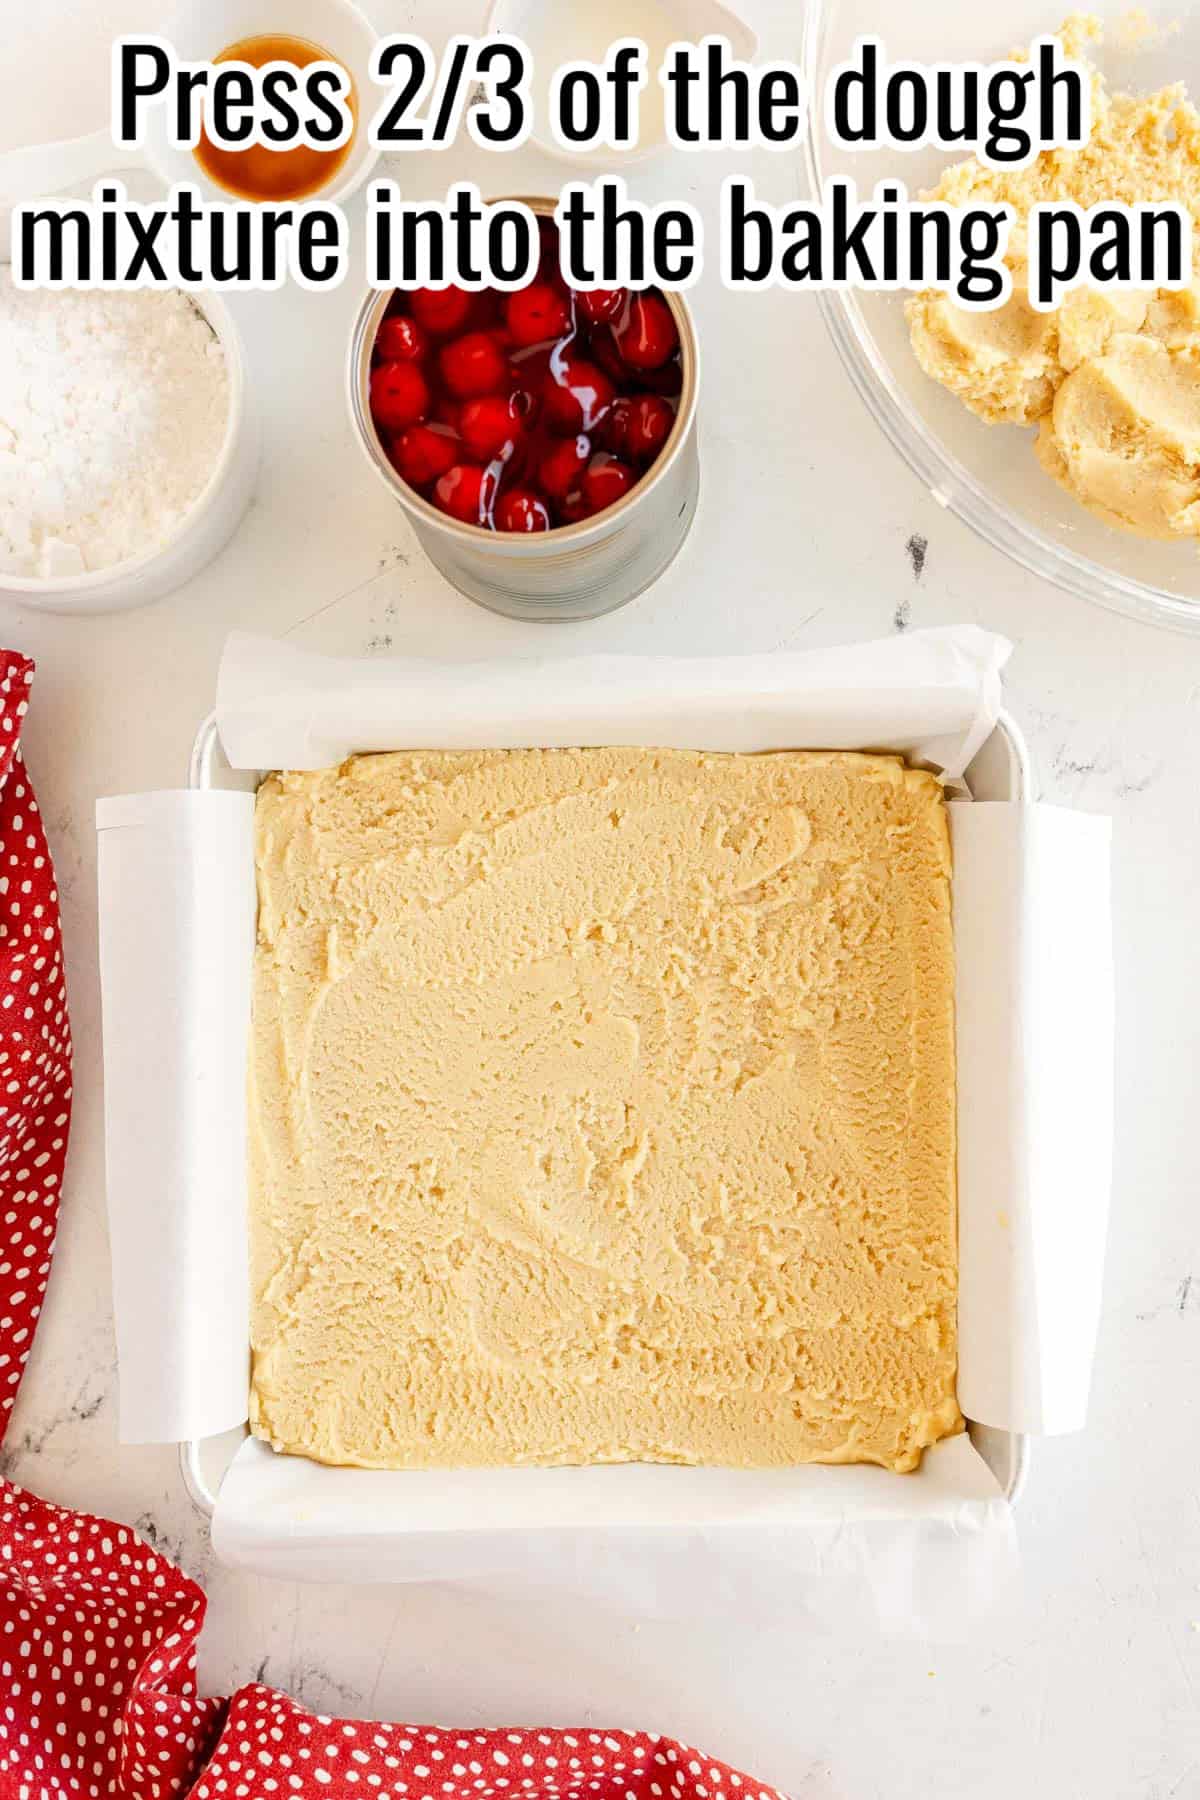
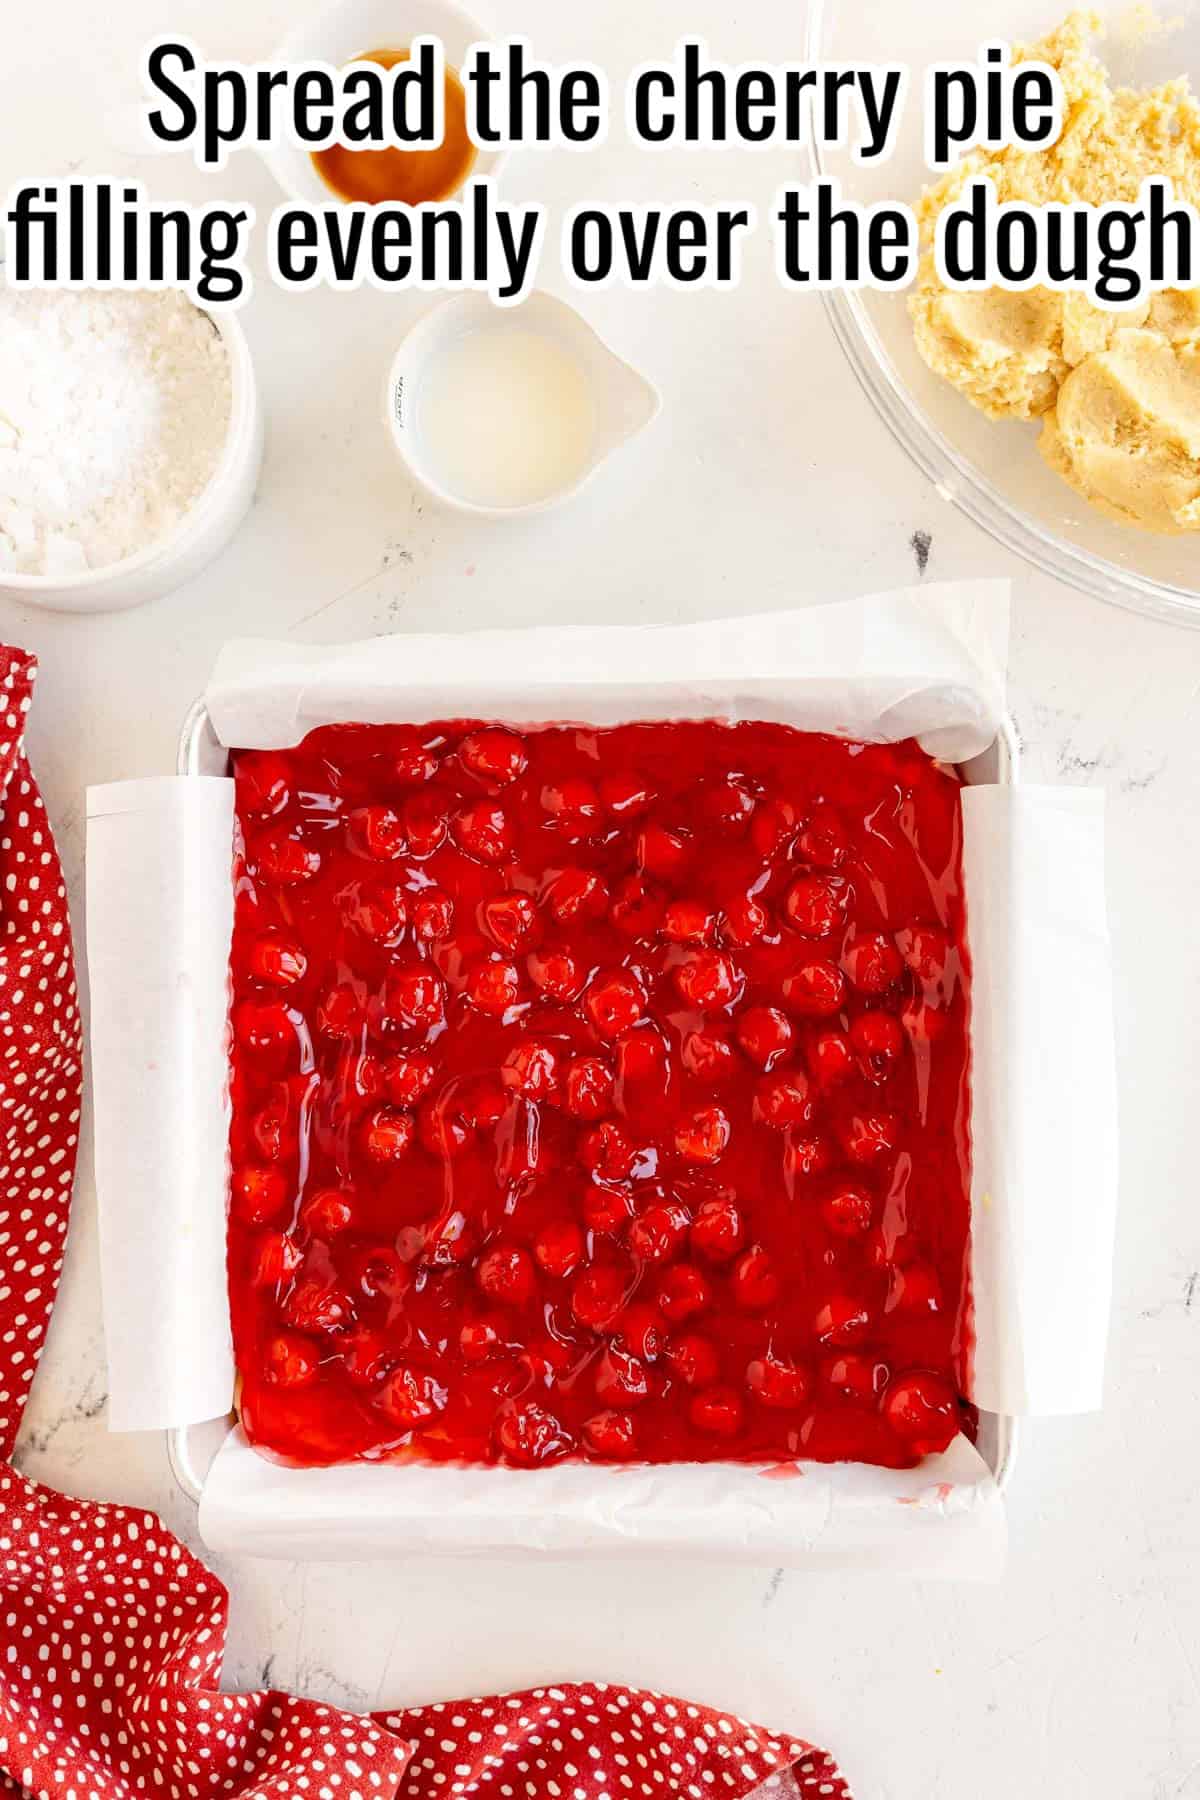
Press 2/3 of the dough mixture into the bottom of the prepared baking pan, creating an even layer. Spread the cherry pie filling evenly over the dough.
Bake the bars, let the bars cool
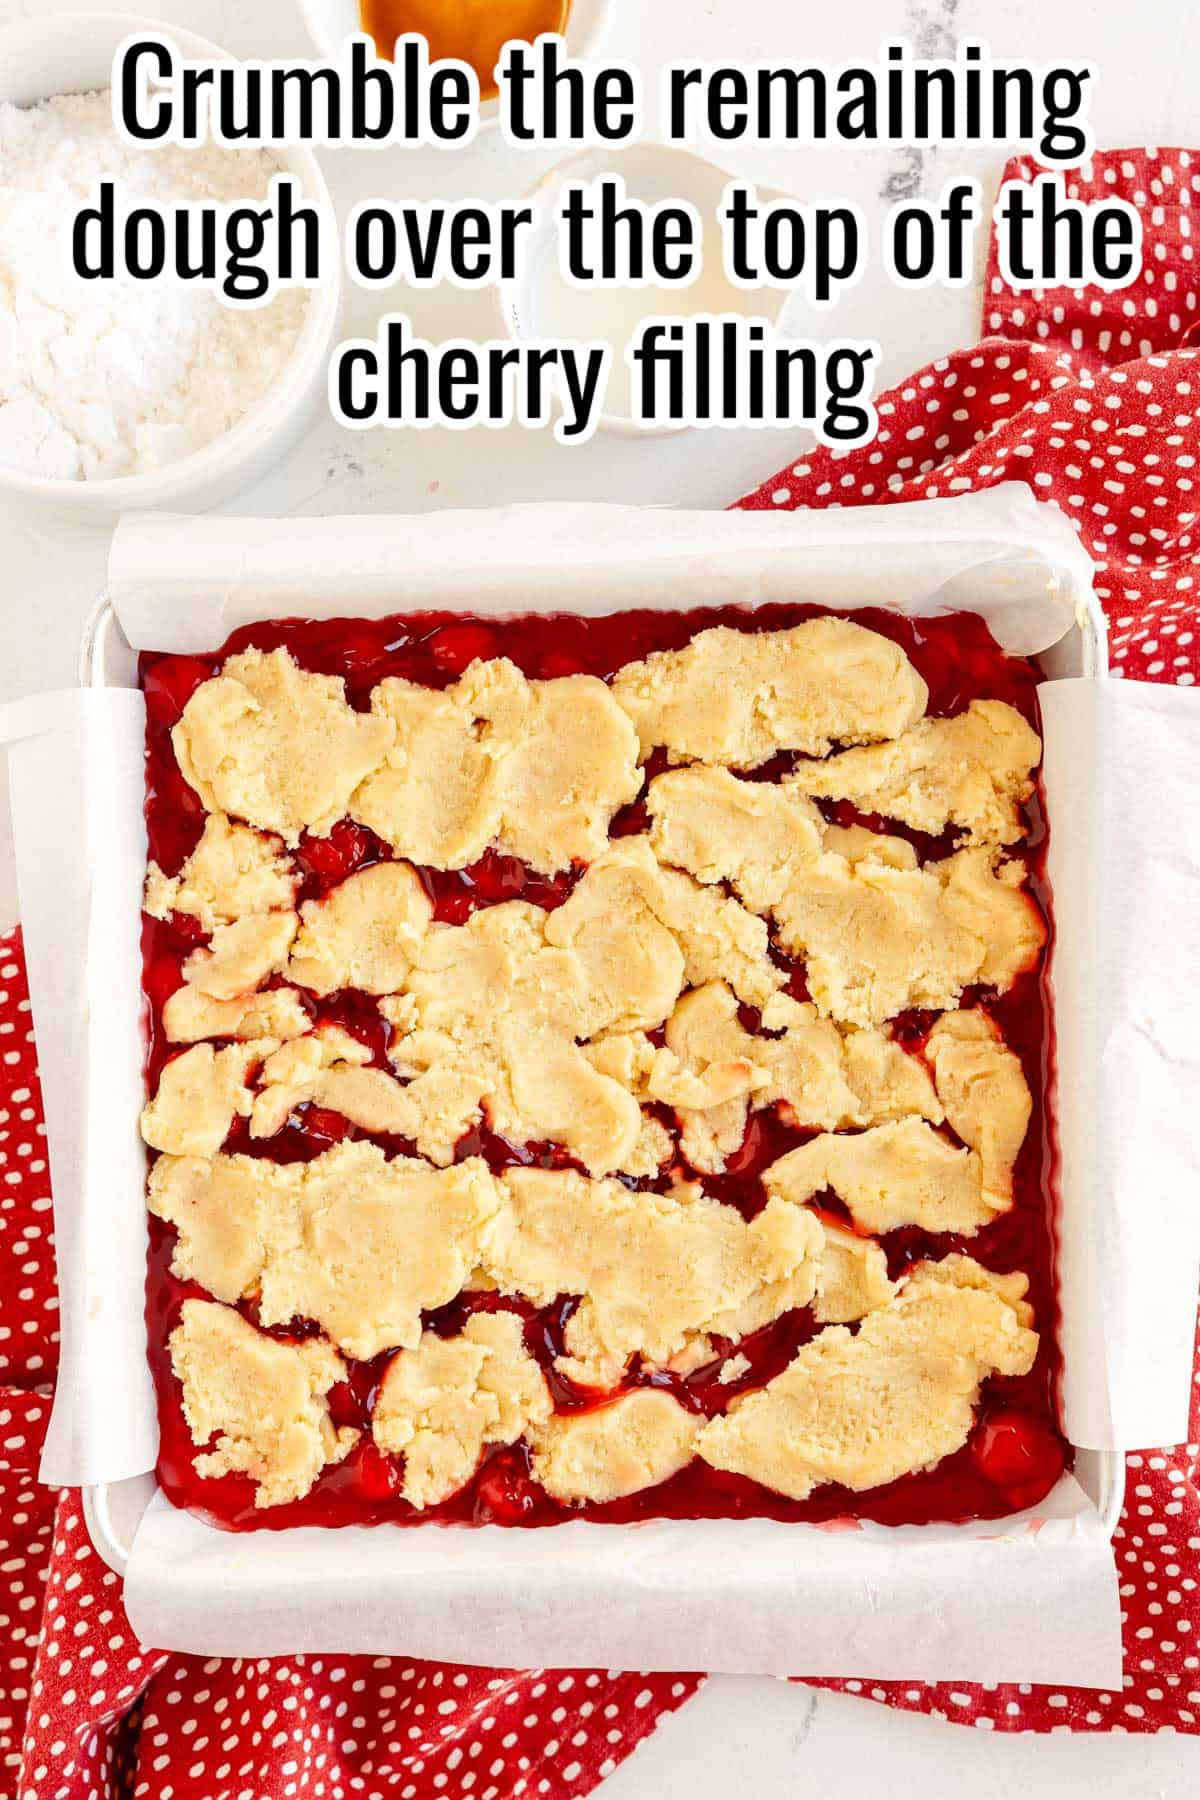
Crumble the remaining dough over the top of the cherry filling. Bake in the preheated oven for 30 minutes or until the top is lightly golden. Remove from the oven and allow the bars to cool completely.

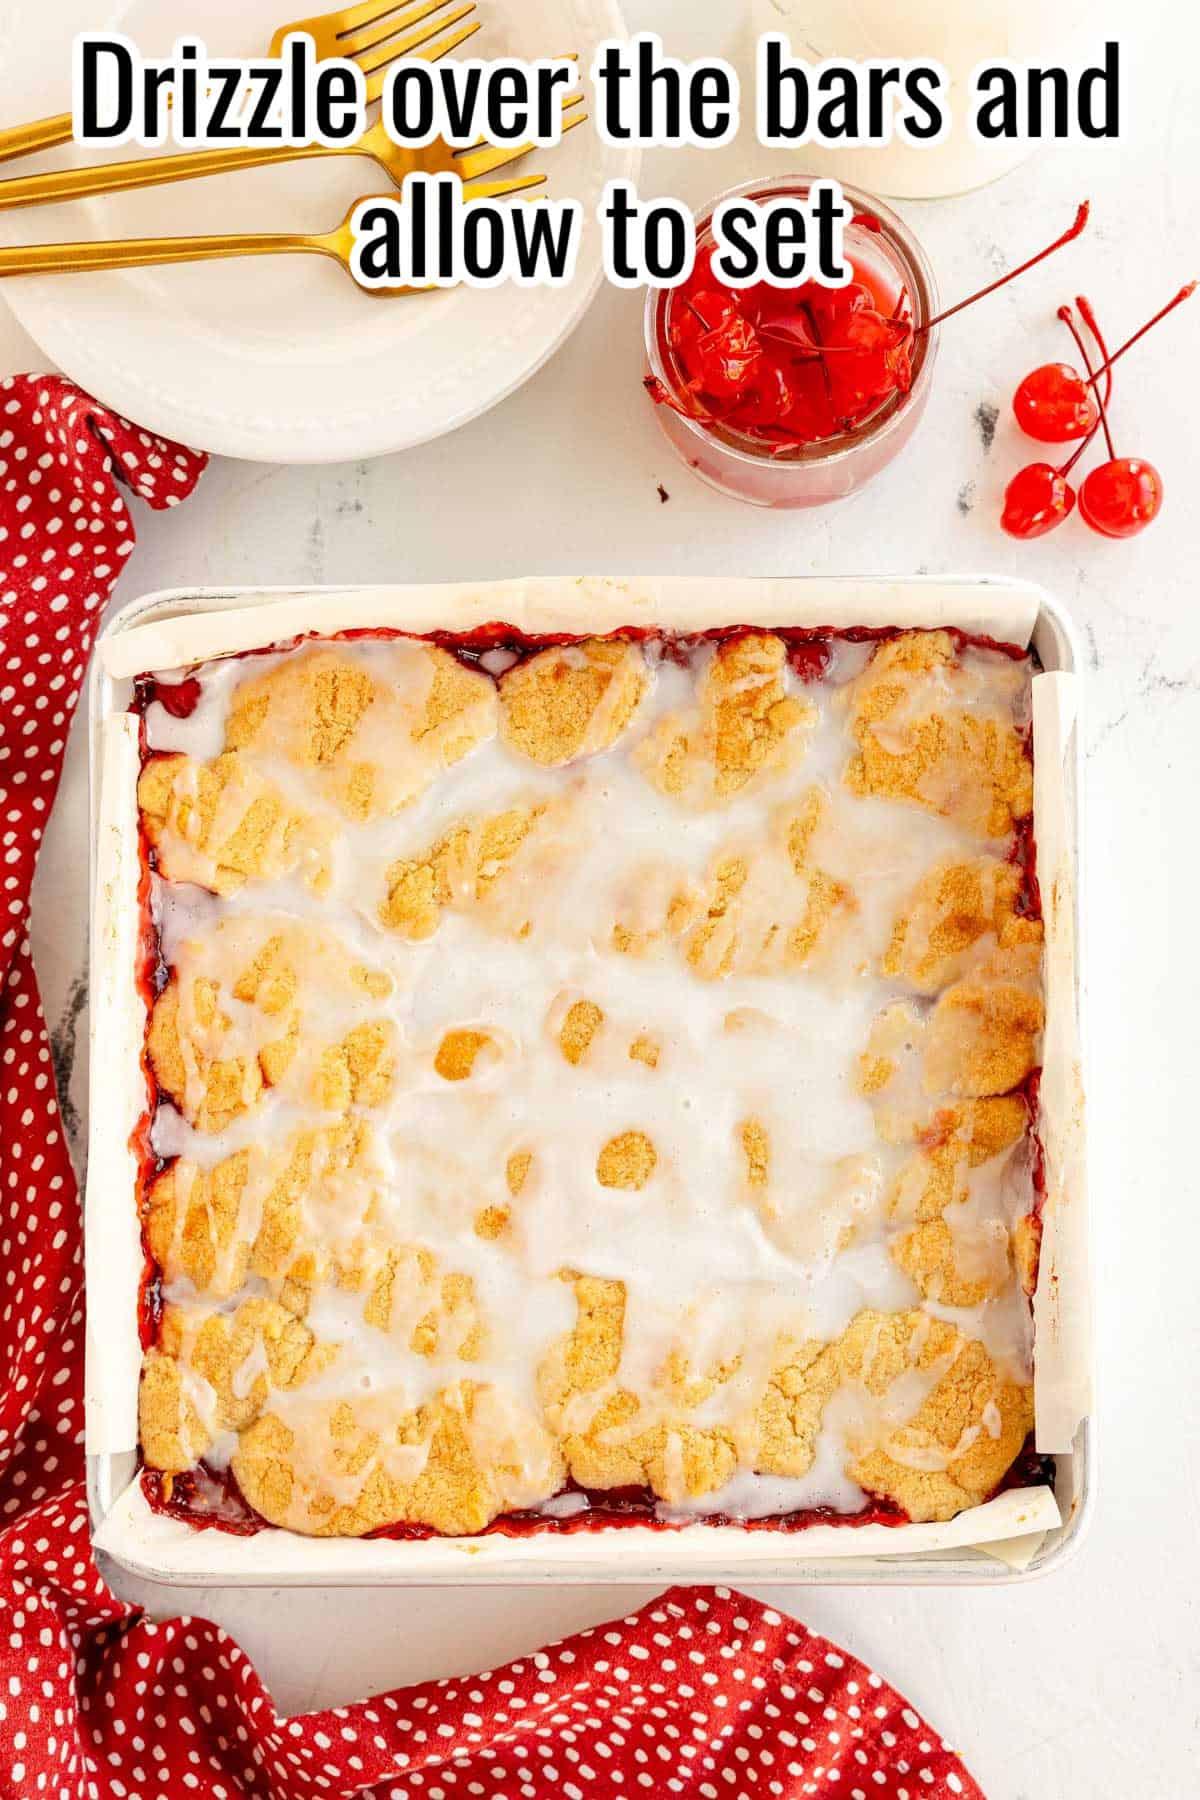
Optional Glaze. Whisk together the powdered sugar, vanilla and milk. Add more milk if needed to get a drizzling consistency. Drizzle over the bars and allow to set.
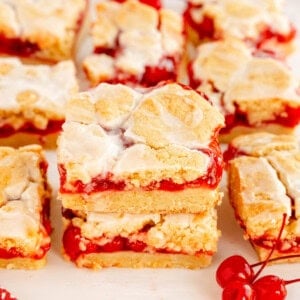
Cut the bars. Use a sharp knife and cut the cooled bars into squares. Do 16 bars or 9 bars depending on how big you want them to be!
Kylee’s Notes
Softening the butter is important for creating a crumbly texture in the dough. Leave it out at room temperature for about 30 minutes before using.
If you like a thicker crust, you can press more of the dough mixture into the bottom of the pan.
These bars can be stored in an airtight container at room temperature for up to 3 days.
These can be served as is or with a scoop of vanilla ice cream.
How to store Cherry Pie Bars
Cool completely. Store cherry pie bars in an airtight container at room temperature for up to 3 days. For longer storage, you can refrigerate them for up to 5 days.
More recipes to love
- No Bake Pumpkin Cream Pie. A quick, easy fall dessert! Creamy pumpkin filling with a buttery graham cracker crust, whipped topping, and a sprinkle of spice!
- Strawberry Muffins. Packed full of fresh flavors, and last about 5 minutes after coming out of the oven! They’ll be devoured FAST!
- Cinnamon Pie Crust Cookies. Wonderfully crispy, buttery with a sweet flavor. They’re tasty and easy to make with just 4 ingredients!
- Raspberry Crumb Muffins. Delicate, vanilla-y muffins, with a buttery crumb topping, and a sweet jammy surprise inside, these won’t last long.
Get free recipes in your inbox!
Find me on Pinterest, Facebook & Instagram.
If you make this recipe, please comment and let me know how it turned out and leave a star rating! ⭐⭐⭐⭐⭐
Cherry Pie Bars
Equipment
- Pastry Cutter or forks
Ingredients
- 2 cups all-purpose flour
- 1 cup white sugar
- 1 teaspoon baking powder
- 1 cup salted butter softened
- 1 large egg
- 1 teaspoon vanilla extract
- 21 ounces cherry pie filling 1 x 21-ounce can
Optional Glaze:
- ½ cup powdered sugar
- ¼ teaspoon vanilla extract
- 1 tablespoon milk
Instructions
Get prepped
- Preheat your oven to 350°F (175°C). Line an 8×8-inch baking dish with parchment paper.
Prepare the dough
- In a large bowl, mix together 2 cups all-purpose flour, 1 cup white sugar, and 1 teaspoon baking powder. Cut in the 1 cup salted butter (softened) until the mixture is crumbly. Stir in 1 large egg and 1 teaspoon vanilla extract until combined.
Assemble the bars
- Press 2/3 of the dough mixture into the bottom of the prepared baking dish, creating an even layer. Spread the 21 ounces cherry pie filling evenly over the dough. Crumble the remaining dough over the top of the cherry filling.
Bake the bars
- Bake in the preheated oven for 30 minutes or until the top is lightly golden. Remove from the oven and let cool completely.
Optional Glaze:
- Whisk together the ½ cup powdered sugar, ¼ teaspoon vanilla extract, and 1 tablespoon milk. Add more milk if needed to get a drizzling consistency.
- Drizzle over fully cooled bars.
Serve
- Cut into 16 bars and enjoy!
Notes
• If you like a thicker crust, you can press more of the dough mixture into the bottom of the pan.
• These bars can be stored in an airtight container at room temperature for up to 3 days.
• These can be served as is or with a scoop of vanilla ice cream.
Would you like to save this recipe?
Nutrition
Nutritional information is an estimate and provided to you as a courtesy. You should calculate the nutritional information with the actual ingredients used in your recipe using your preferred nutrition calculator.
Did you make this recipe?
Make sure to follow @kyleecooks on Instagram for more and tag me #kyleecooks so I can see!
About Kylee Ayotte
I am a born and raised New Zealander (a Kiwi), now living in Phoenix, Arizona. I’m happily married to the love of my life – a hot American boy I met while traveling the world. I’m a mama to 2 awesome little boys and love red things, rugby, cheesecake, and bacon. Mmmmm. Bacon. Meet Kylee


I made Cherry Pie Bars today for Pi Day. Used Splenda in place of the sugar and no sugar cherries.
Real good and such an easy desert to make. The hardest part was waiting for it to cool.
Thank you!