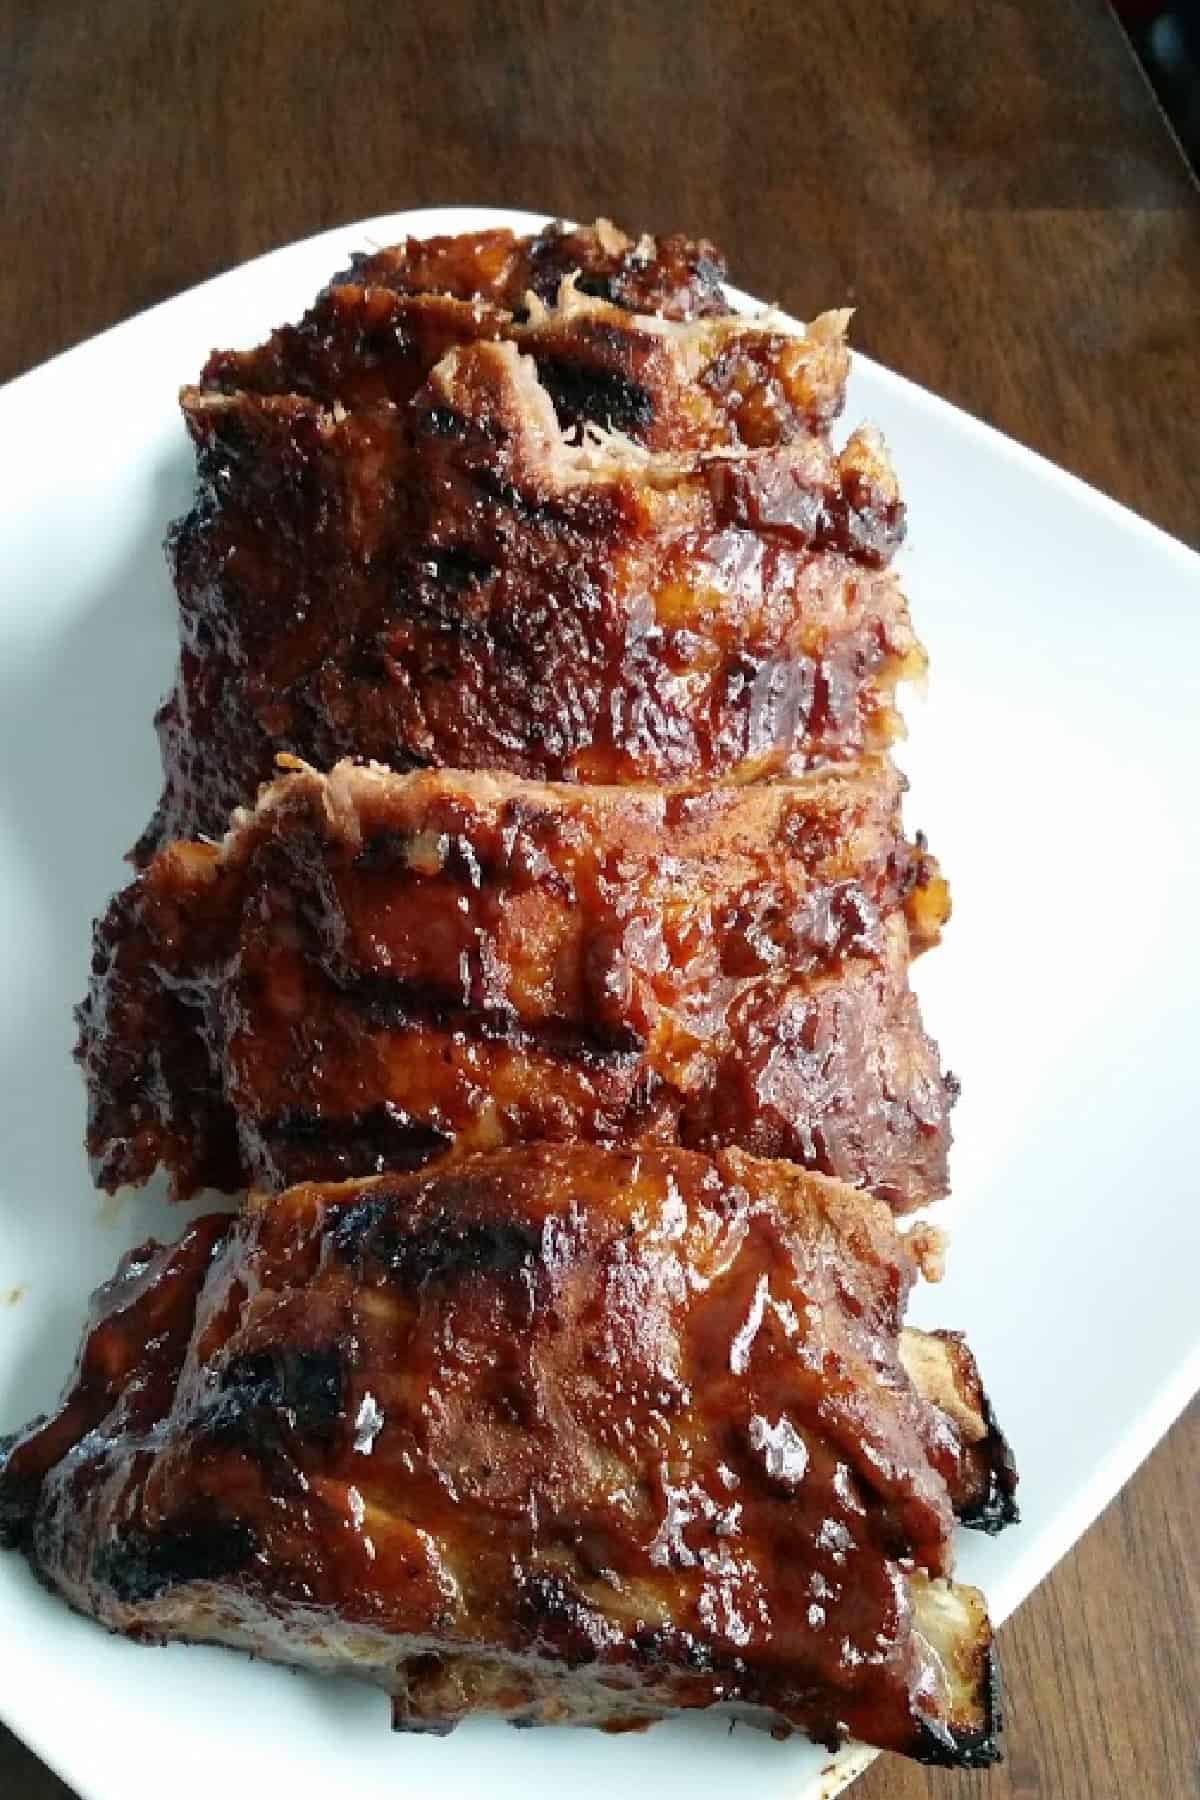
Oven Baked BBQ Ribs (Sweet & Spicy)
This post may contain affiliate links which won’t change your price but will share some commission. Full Disclosure Policy.
Sweet, sticky, and just a little bit spicy, these oven baked ribs are the kind of dinner that makes everyone suddenly appear in the kitchen asking when they’ll be ready. The meat turns tender, the sauce gets glossy and caramelized, and the whole thing tastes like you worked way harder than you actually did.
Sometimes, I just don’t want to go outside and start the grill, so these ribs are my oven solution. They cook low and slow until the meat is fall-apart tender, then finish with a quick blast of heat so the barbecue sauce turns sticky and irresistible.
This is a baked ribs recipe, so if you want a quicker way – try these Instant Pot Ribs. You might like to try these BBQ Grilled Ribs, too.
Update: This recipe was originally published in June of 2016. It was updated and republished in March of 2026.
Step-by-step photos and instructions are below. Jump to the recipe card if you wish!
Why you’ll love this
- No grill required: Everything happens in the oven, low and slow for tender meat, then a quick blast of heat to caramelize the sauce.
- Simple ingredients: The rub is made from pantry staples, and the results are anything but basic.
- Not too spicy: Don’t worry about the rub being too spicy. It doesn’t bring heat, it just adds a deep, smoky flavor that makes the ribs taste incredible.
- Worth the wait: The hands-on time is minimal. Most of the work is just letting the oven do its thing.
Pro tip: One trick that makes this recipe even easier is keeping a jar of the rib rub on hand. I like to double or triple it and store it in an airtight container so it’s ready whenever the rib mood strikes.
What to Serve with Ribs
These ribs are practically a full dinner on their own, but the right sides make it a spread worth lingering over. Here are some favorites that work beautifully alongside them:
- Dr Pepper Baked Beans: Smoky, sweet, and can go in the oven right alongside the ribs.
- Oven Baked Potato Wedges: Crispy and simple, great for soaking up extra sauce.
- Crockpot Mac and Cheese: Set it and forget it while the ribs do their thing in the oven.
- Easy Coleslaw: No cooking required, and the cool crunch balances the rich, sticky ribs perfectly.
- Bacon, Parmesan and Arugula Potato Salad: A little fancier if you want to impress.
Key Recipe Ingredients
Note: This highlights some ingredients. Full list is in the recipe card.
- St. Louis Style Ribs: Meatier and more uniform than baby back ribs, ideal for low and slow oven cooking. Baby back ribs work too, just reduce the cook time slightly.
- Smoked Paprika: The backbone of the rub. It adds deep BBQ color and subtle smokiness even without a grill.
- Chili Powder: Use a prepared chili powder blend, not straight ground chilis. It adds flavor and depth without real heat.
- Brown Sugar: Helps the rub caramelize as the ribs bake, giving you that sticky, slightly sweet crust.
- BBQ Sauce: Use your favorite sauce, or try this Homemade BBQ Sauce for the best results.
- Apple Juice and Apple Cider Vinegar: These make the mop, which keeps the ribs moist during the long bake and adds a gentle tang to balance the sweetness.
How to make this recipe
This is a step-by-step photo guide. Full ingredients and instructions are in the printable recipe card below.
JumpWould you like to save this recipe?
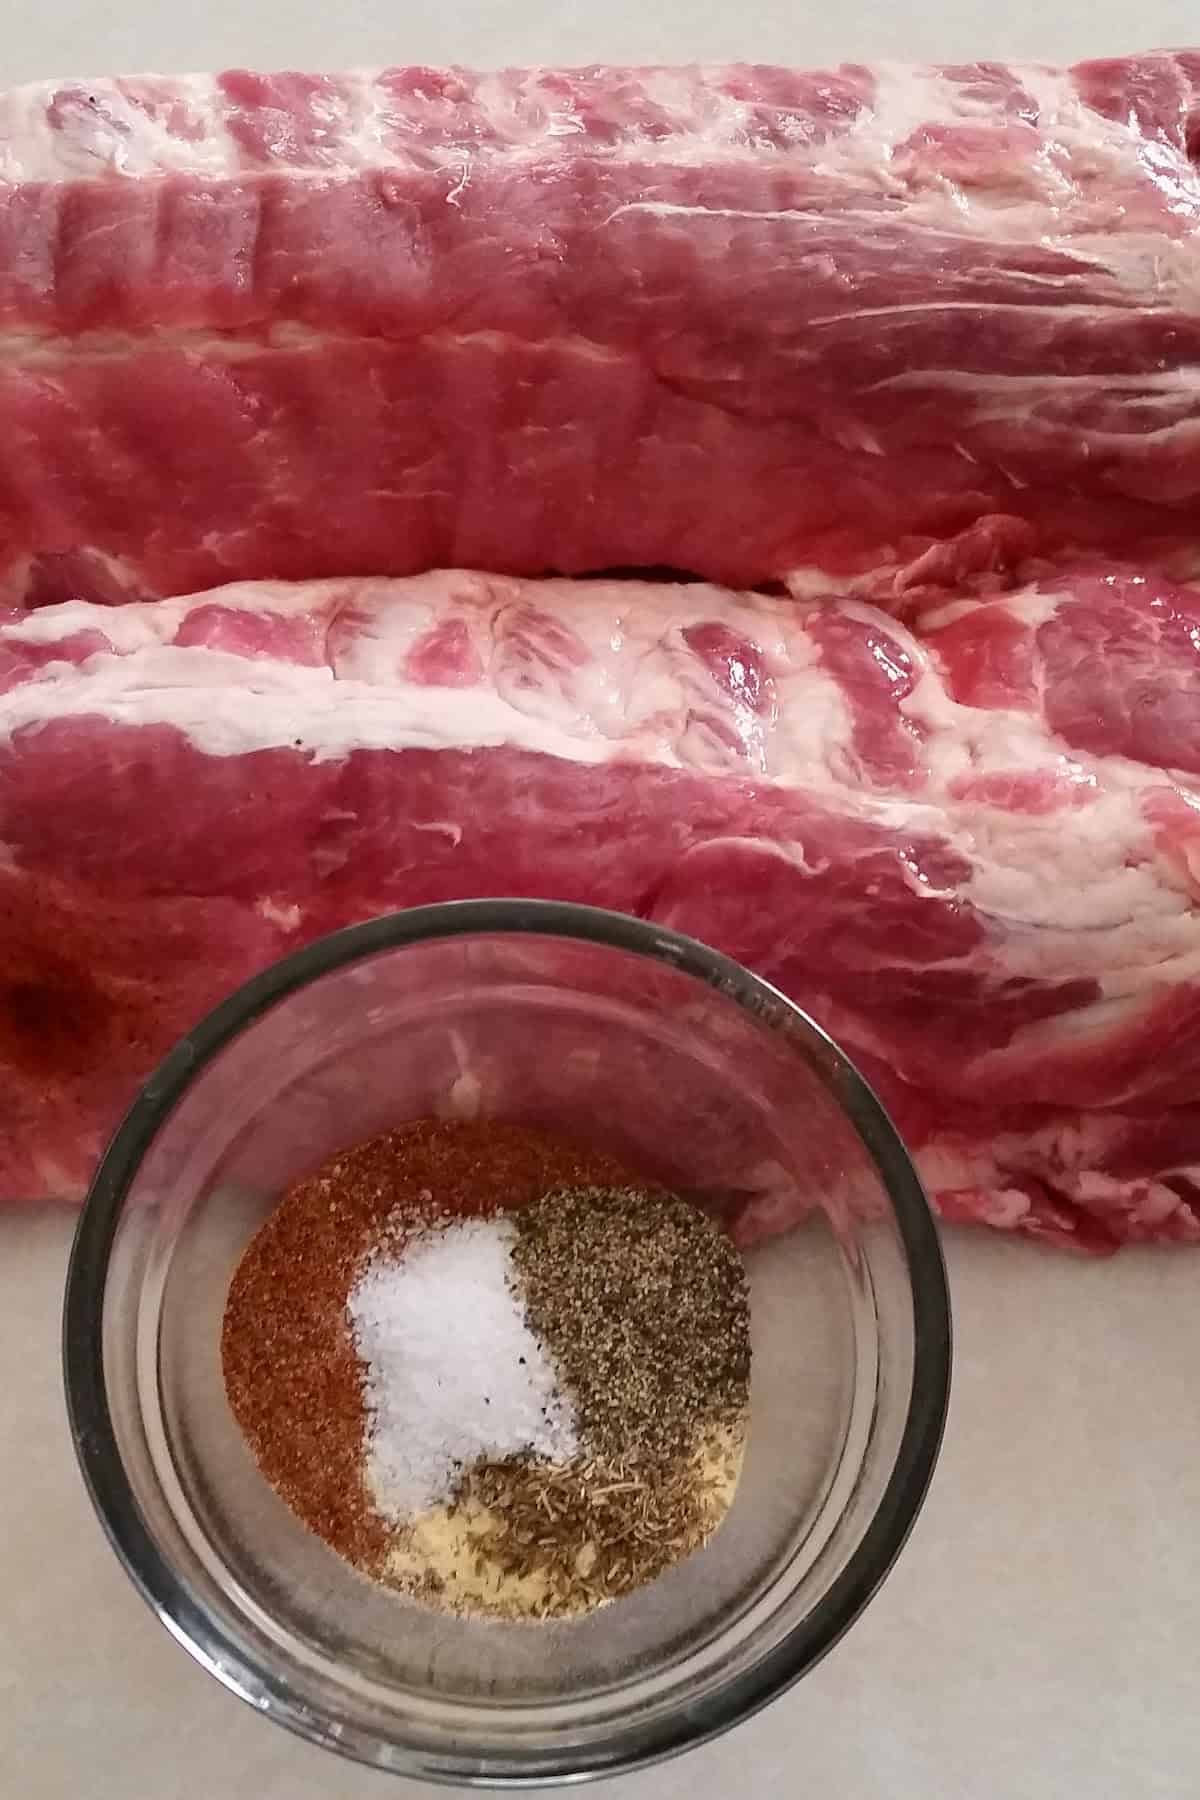
Prep the ribs. Remove the membrane from the back of each rack (see below for step-by-step photos on how to do this).
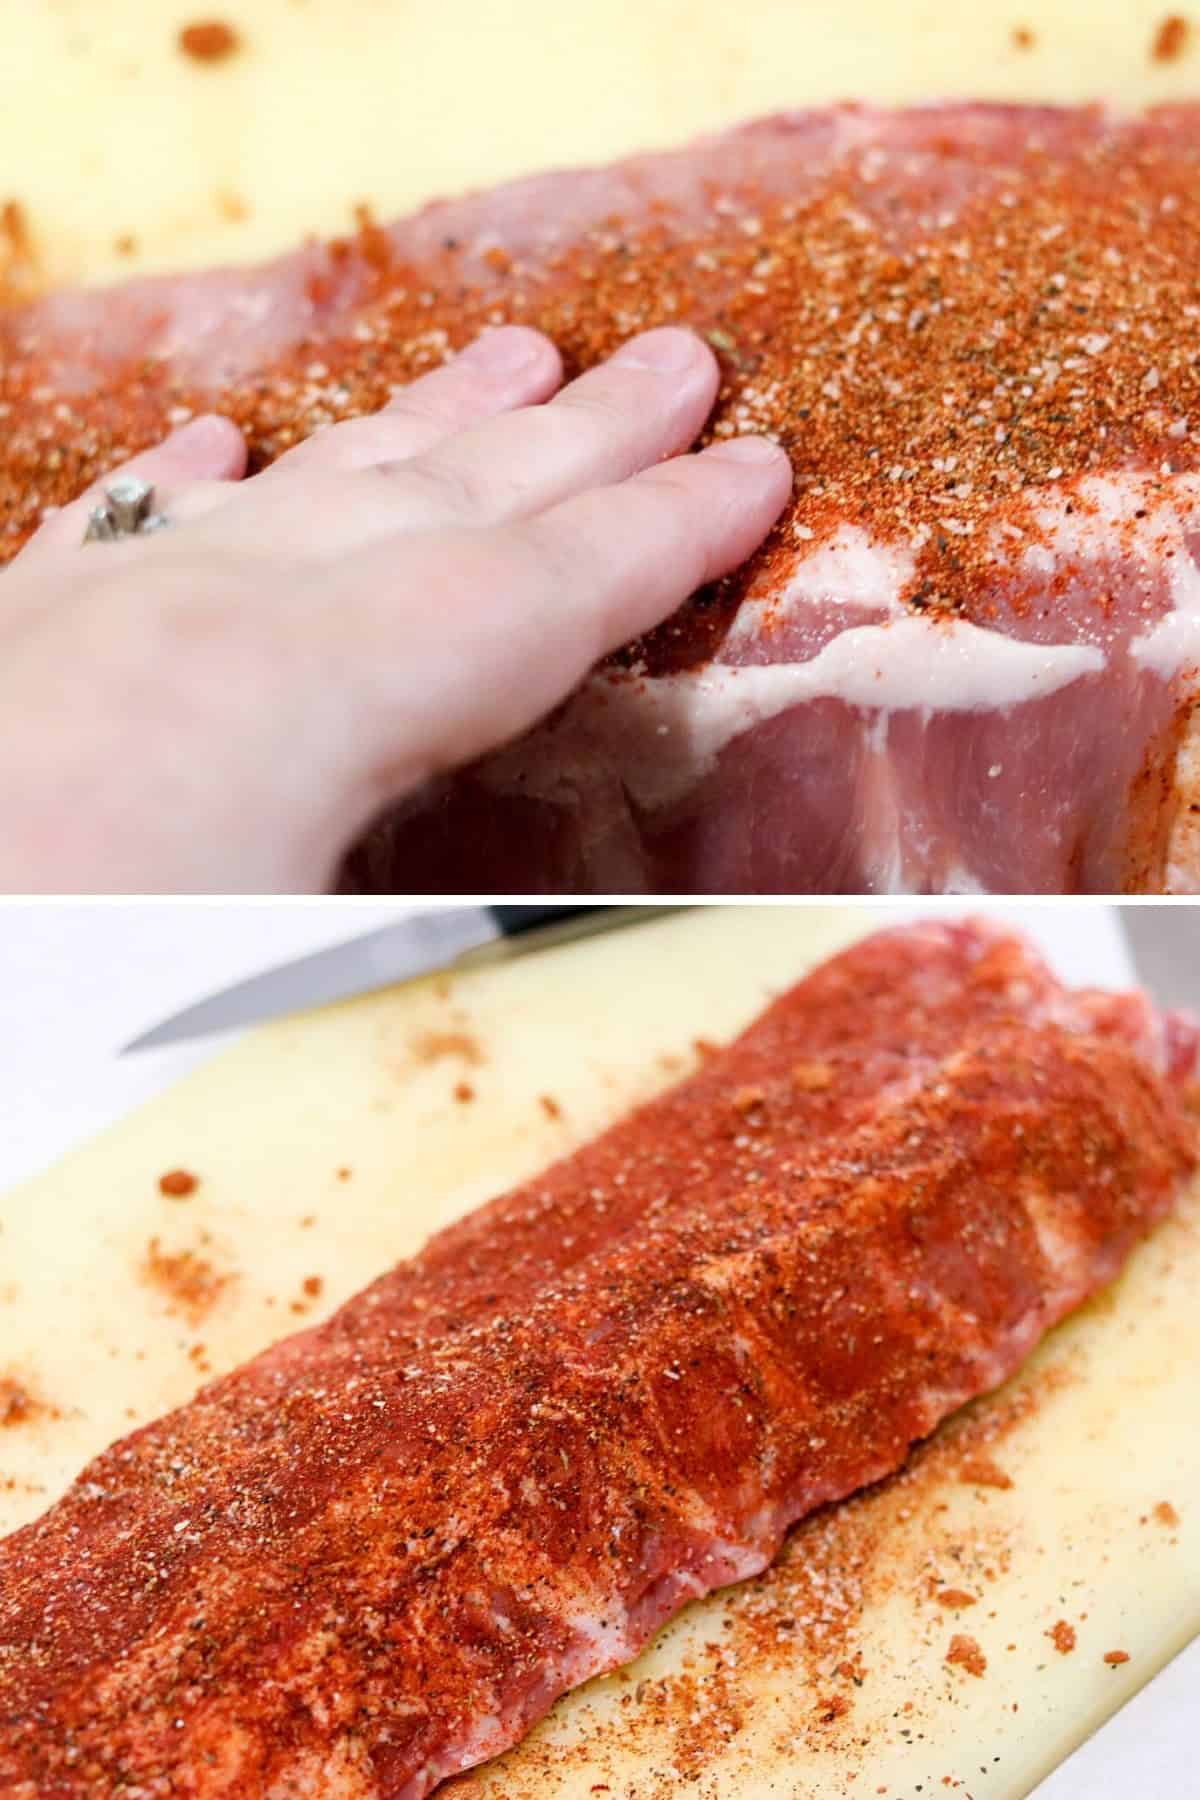
Pat the ribs dry, then coat them generously with the dry rub spice mix. Place on a baking sheet, cover and refrigerate for at least an hour, or overnight if you have time.
Bake low and slow. Wrap the ribs tightly in aluminum foil and bake at 300°F. Every 30 to 45 minutes, brush them with the mop mixture to keep them moist and build flavor. Plan on about 3 hours total.
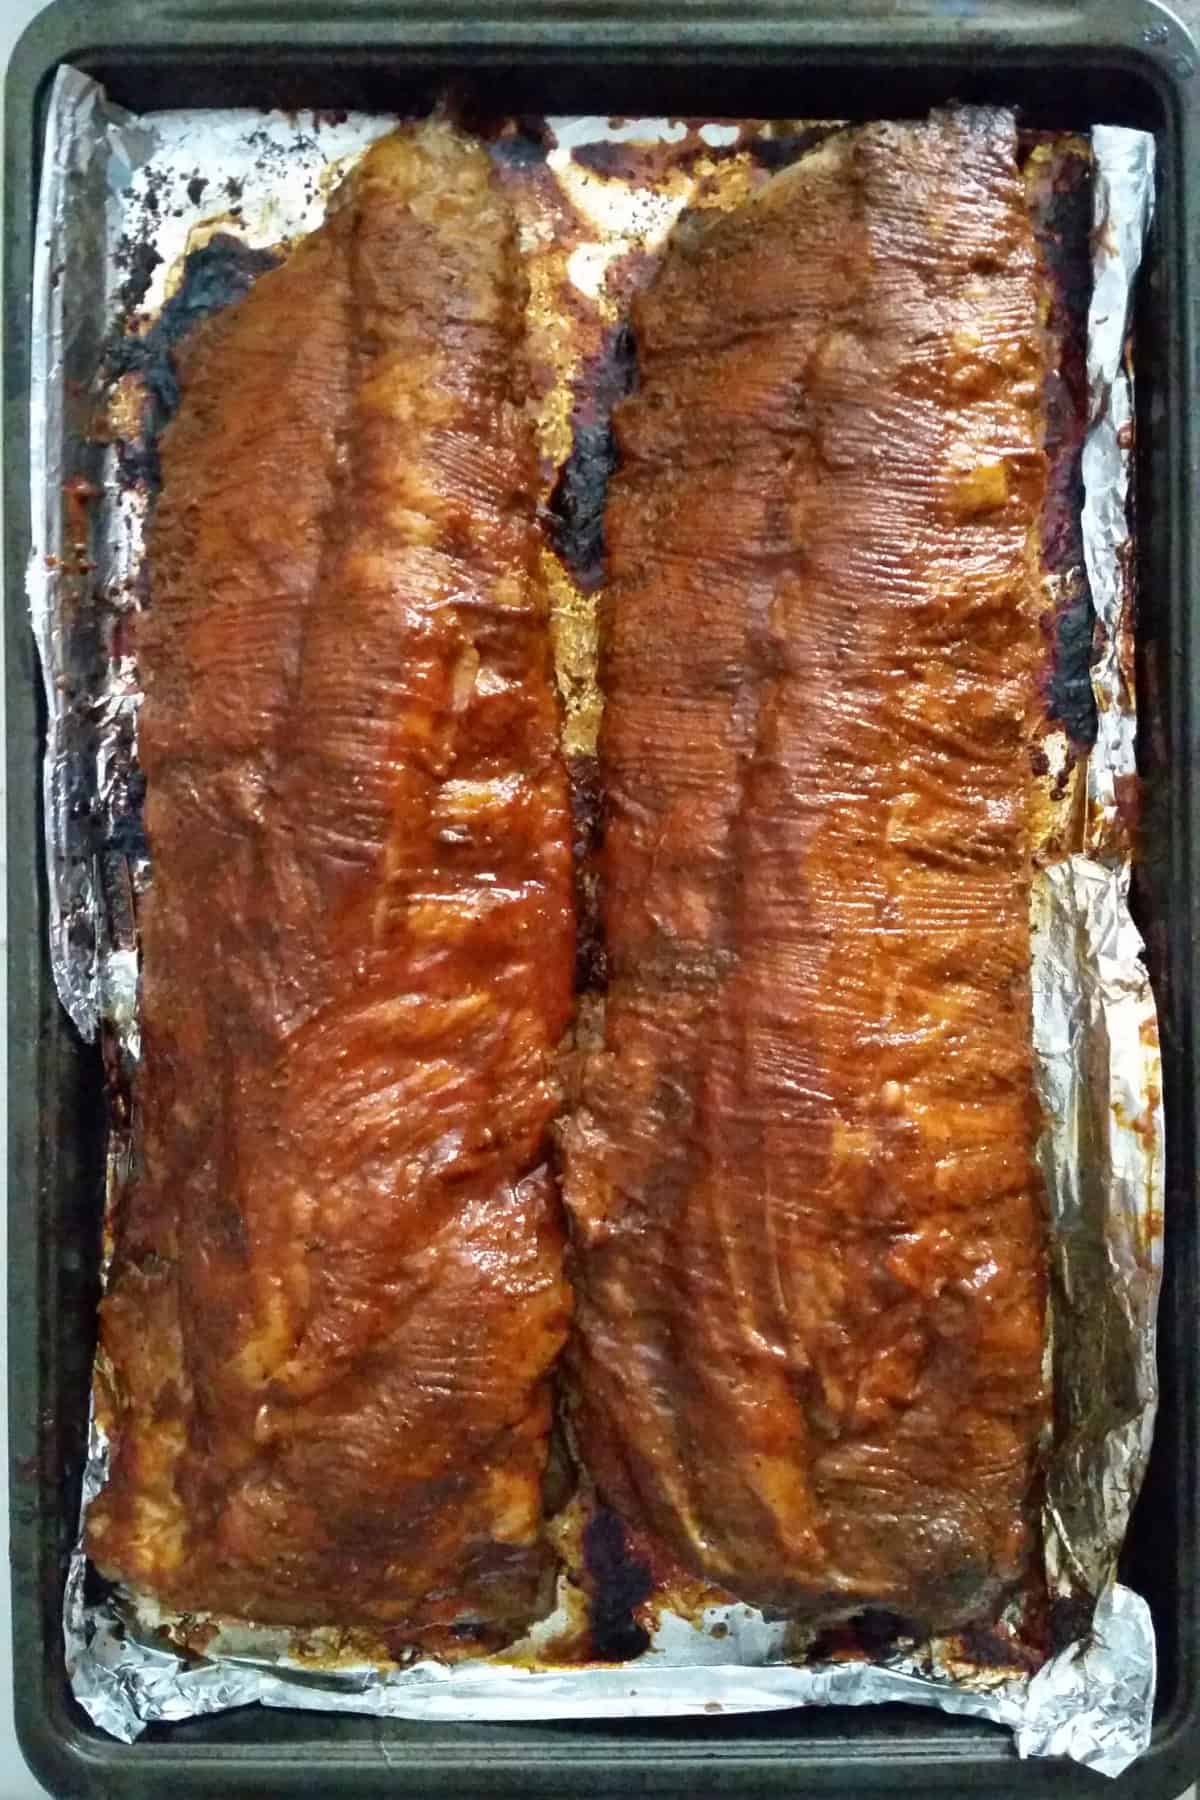
Sauce and finish. Unwrap, brush generously with BBQ sauce, then crank the oven to 400°F. Bake uncovered for 10 to 15 minutes until the sauce is sticky and caramelized. You can also broil them to get them charred on the top.

Rest before serving. Remove from the oven, baste once more, cover loosely with foil, and rest for 20 to 30 minutes. Then slice between the bones and serve.
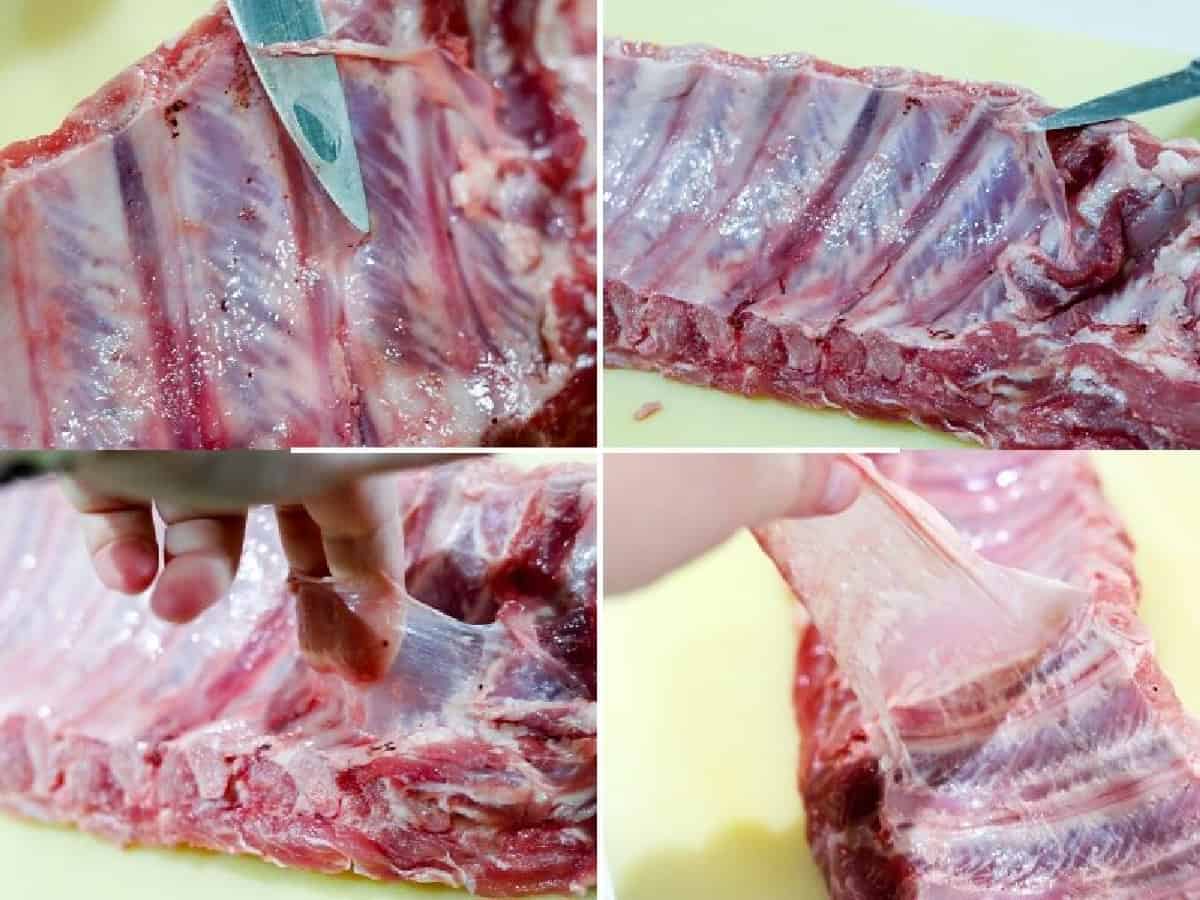
How to remove the membrane from ribs
Pat the racks of ribs dry with a paper towel.
Take a dull knife, slide the tip under the membrane on the back of each rack, and loosen it.
Take the corner of it and pry off the entire membrane from the back of the ribs.
Troubleshooting Guide
- Ribs are tough. They likely need more time. Ribs become tender when the connective tissue breaks down, which takes slow cooking. Return them to the oven and cook another 20 to 30 minutes, then check again.
- Sauce isn’t sticky. Increase the oven temperature and cook uncovered a little longer so the sauce can caramelize. Brushing on another thin layer of sauce can also help build that glossy finish.
- Sauce is burning before the ribs are done. Wait until the last 10 to 15 minutes before adding the BBQ sauce. The sugar in the sauce burns easily, so it should only go on at the end when you crank the oven up to 400°F. If it’s still catching, tent the ribs loosely with foil to protect the sauce while the meat finishes cooking.
FAQs
St. Louis style ribs are the best choice for this recipe. They are meatier and more uniform in size, which makes them ideal for low and slow oven cooking. Baby back ribs work too, but they are smaller so check them a little
Yes, with a slight adjustment. Baby back ribs are smaller and leaner, so reduce the total cook time by about 30 to 45 minutes and start checking for tenderness earlier.
The meat should start pulling back from the ends of the bones, and when you lift the rack with tongs the ribs should bend and start to crack slightly. A toothpick or skewer should slide into the meat with little resistance.
Yes. Add a little of the mop mixture to the bottom of the crockpot and cook on low for 8 hours. Finish under the broiler or in a hot oven to caramelize the sauce.
Yes. Bake the ribs fully, let them cool, then refrigerate. Reheat covered in foil at 300°F until warmed through, then add a fresh layer of sauce and finish uncovered at 400°F for a few minutes.
Kylee’s Notes
- Plan ahead: These ribs need time to cook low and slow. Start at least 4 hours before you want to eat.
- Take the membrane off first. The thin membrane on the back of ribs can turn chewy when cooked. Sliding a knife under it and pulling it off helps the ribs cook more evenly and makes them easier to eat. See how in the section above
- Let the rub do its thing. If you have time, letting the ribs sit in the fridge with the rub for a few hours or overnight gives the seasoning more time to soak into the meat.
- Bake them covered first. The foil traps moisture while the ribs cook low and slow. This helps break down the connective tissue and makes the ribs tender.
- Mopping builds flavor. Brushing the ribs with the mop mixture during cooking layers in flavor and keeps the ribs from drying out.
- Finish them uncovered. Turning up the oven at the end lets the barbecue sauce bubble and caramelize so the ribs get that sticky, glossy coating everyone wants.
- Guard the leftovers. These ribs disappear fast, so don’t be surprised if the fridge gets raided later.
Get free recipes in your inbox!
Find me on Pinterest, Facebook & Instagram.
If you make this recipe, please comment and let me know how it turned out and leave a star rating! ⭐⭐⭐⭐⭐

Oven Baked BBQ Ribs (Sweet & Spicy)
Ingredients
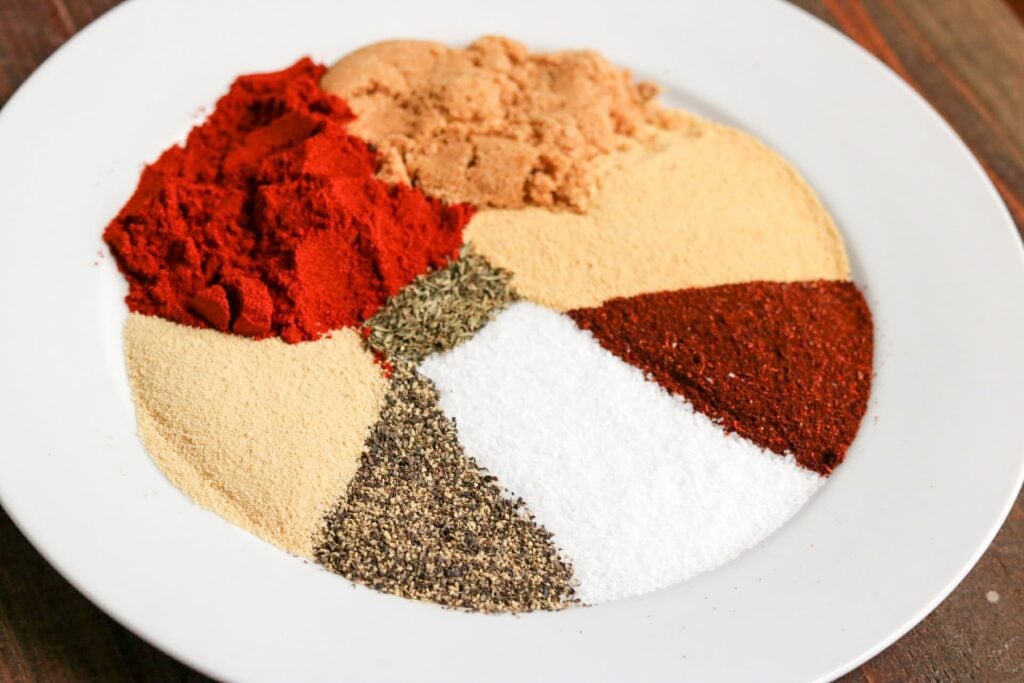
Rub
- 2 tablespoons paprika smoked
- 1 1/2 tablespoon dark brown sugar packed
- 1 tablespoon garlic powder
- 1 tablespoon prepared chili powder
- 1 tablespoon kosher salt
- 1 1/2 teaspoon onion powder
- 1 1/2 teaspoon cracked pepper
- 1/2 teaspoon dried thyme
- 1/2 teaspoon cayenne pepper
Ribs
- 2 Racks St Louis Style Ribs
- 1 1/2 cups BBQ sauce divided
Mop
- 1 cup apple juice
- 6 tablespoons bbq sauce from above
- 1/4 cup apple cider vinegar
Instructions
- Get prepped. Remove the membrane from the back of the ribs if it is still attached. Pat the ribs dry with paper towels.
- Rub the ribs. Sprinkle the rub evenly over the ribs and massage it into the meat. Cover and refrigerate for at least 1 hour, or overnight for deeper flavor.
- Preheat the oven. Preheat the oven to 300°F (150°C). Place the ribs on a foil-lined sheet pan and cover tightly with foil.
- Bake the ribs. Bake for 1 hour.
- Make the mop. Combine the apple juice, a few spoonfuls of barbecue sauce, and the apple cider vinegar in a small bowl.
- Mop the ribs. After the first hour, brush the ribs with the mop mixture. Return to the oven and continue mopping every 30 to 45 minutes. Bake for about 3 hours total, until the ribs are tender and the meat begins to pull back from the bones.
- Sauce the ribs. Remove the ribs from the oven and brush generously with barbecue sauce.
- Finish the ribs. Increase the oven to 400°F (205°C). Return the ribs to the oven uncovered and cook for 10 to 15 minutes, basting once or twice with more sauce, until the sauce is sticky and caramelized.
- Rest the ribs. Remove from the oven, baste once more with sauce, cover loosely with foil, and rest for 20 to 30 minutes.
- Serve. Slice between the bones and serve.
Notes
- Start these ribs at least 4 hours before you want to eat.
- Chili powder in this recipe refers to a prepared chili powder blend, not straight ground chiles.
- Store-bought BBQ sauce works great here, or try this Homemade BBQ Sauce.
- Leftovers keep in the fridge for up to 4 days or in the freezer for up to 3 months.
Would you like to save this recipe?
Nutrition
Nutritional information is an estimate and provided to you as a courtesy. You should calculate the nutritional information with the actual ingredients used in your recipe using your preferred nutrition calculator.
Did you make this recipe?
Make sure to follow @kyleecooks on Instagram for more and tag me #kyleecooks so I can see!
About Kylee Ayotte
I am a born and raised New Zealander (a Kiwi), now living in Phoenix, Arizona. I’m happily married to the love of my life – a hot American boy I met while traveling the world. I’m a mama to 2 awesome little boys and love red things, rugby, cheesecake, and bacon. Mmmmm. Bacon. Meet Kylee


Its winter would you happen to have an alternative to grilling these?
Yep, just baste with sauce and throw them in the oven.
I talk about it here
https://www.kyleecooks.com/instant-pot-ribs/
Prepared chili powder??? Could you elaborate? Thanks!
Sure!
I say prepared chili powder because I don’t want you to use straight ground ancho chilis or something super hot. It’s a little known fact, but prepared chili powder is actually a BLEND of a few different spices (including cumin, chiles, garlic and salt – but may vary by brand)
wonderful recipe. I will definitely try