How to make a Kit Kat Cake
This post may contain affiliate links. See our affiliate policy here.
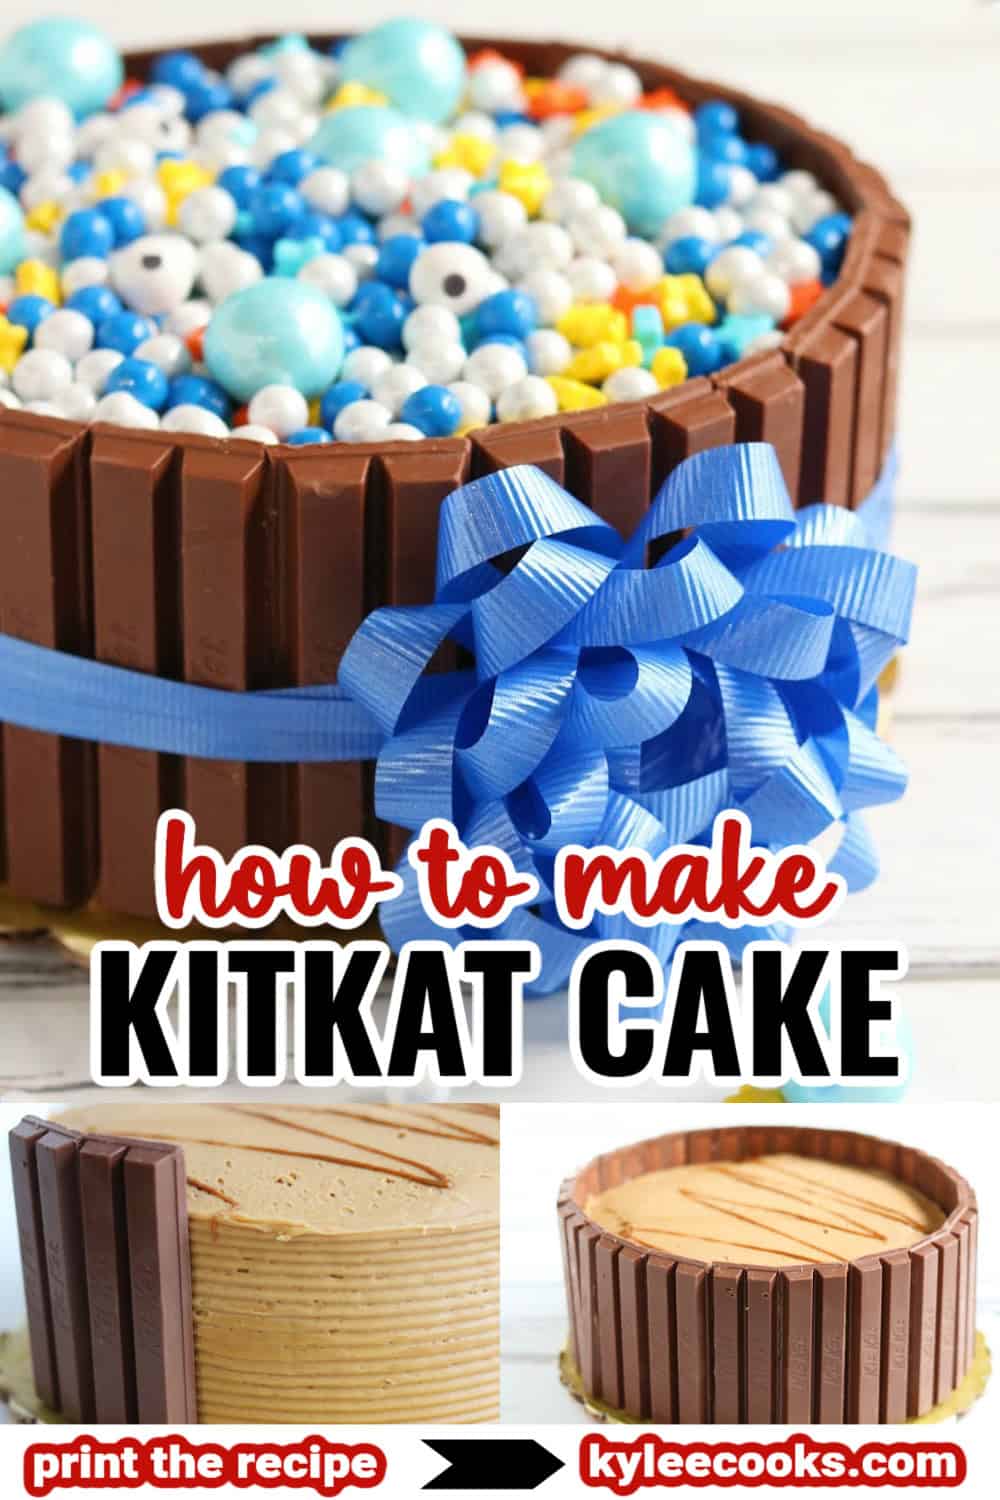
This KitKat cake is one of those party tricks that works for literally any occasion. Just change the color of the candies on top and suddenly it’s a birthday cake, a baby shower cake, a graduation cake, whatever you need it to be. Pick the birthday person’s favorite color, go pastel for a shower, match team colors for game day. Same cake, new personality.
I love this cake because it looks impressive without being complicated. There is no piping, no fancy decorating, no stress. You wrap the cake in KitKat bars, pour candy on top, tie a ribbon, and you’re done. It takes about 15 minutes to assemble, which is my favorite kind of decorating.
And yes, I absolutely cheat and use a store-bought frosted cake. You can too. That is part of the magic here. If you prefer homemade, bake a 9-inch round cake, cool it completely on a wire rack, frost it generously, and then wrap it. But if you’re in survival mode, grab a cake from the bakery section and call it a win.
This is the cake you make when you want compliments without pulling out a piping bag.
Step-by-step photos and instructions are below. Jump to the recipe card if you wish!
Kit Kat Cake Ideas for Any Occasion
This Kit Kat cake works for just about any celebration. Change the candy colors and even the frosting flavor, and it instantly fits the theme. Vanilla, caramel, strawberry, or chocolate buttercream all work beautifully, so you can customize the flavor just as easily as the colors.
- Birthdays. Use rainbow candy or match the birthday person’s favorite color.
- Baby showers. Soft pinks, blues, or pastel candy make it sweet and simple.
- Graduation parties. Match school colors for an easy graduation cake that still looks festive.
- Game day. Use your team’s colors for a fun and easy game day dessert.
- Thanksgiving. Brown, green, beige, and orange candy give it a cozy fall look.
- Christmas. Red and green candy turns it into a holiday centerpiece in minutes.
Why you’ll love this
This Kit Kat cake gives you maximum party impact with minimal effort. It looks like a bakery cake, but it’s surprisingly simple to assemble.
What Else to Serve with Kit Kat Cake
If you’re making this for a party, keep the rest simple and snacky. This cake is the centerpiece, so pair it with easy crowd favorites that don’t require a fork and knife. Add something savory like ham sliders or a warm queso dip so people can graze before cake.
And don’t forget drinks. A big pitcher of strawberry lemonade or raspberry limeade keeps things festive without extra work.
Step-by-step photos and tips and tricks are below. Jump to the full recipe card instead
Key Recipe Ingredients
Note: This highlights some ingredients. Full list is in the recipe card.
- Cake. Any 9-inch round cake works. I use a store-bought frosted cake to make this even easier. My favorites are caramel cake and yellow cake with chocolate frosting.
- Homemade cake option. If baking from scratch, bake a 9-inch round cake, cool it completely, then frost the top and sides with a thick layer of buttercream before adding the Kit Kats. Make sure the frosting is firm to the touch so the bars stick properly. I have used this Pink Velvet Cake for this exact purpose.
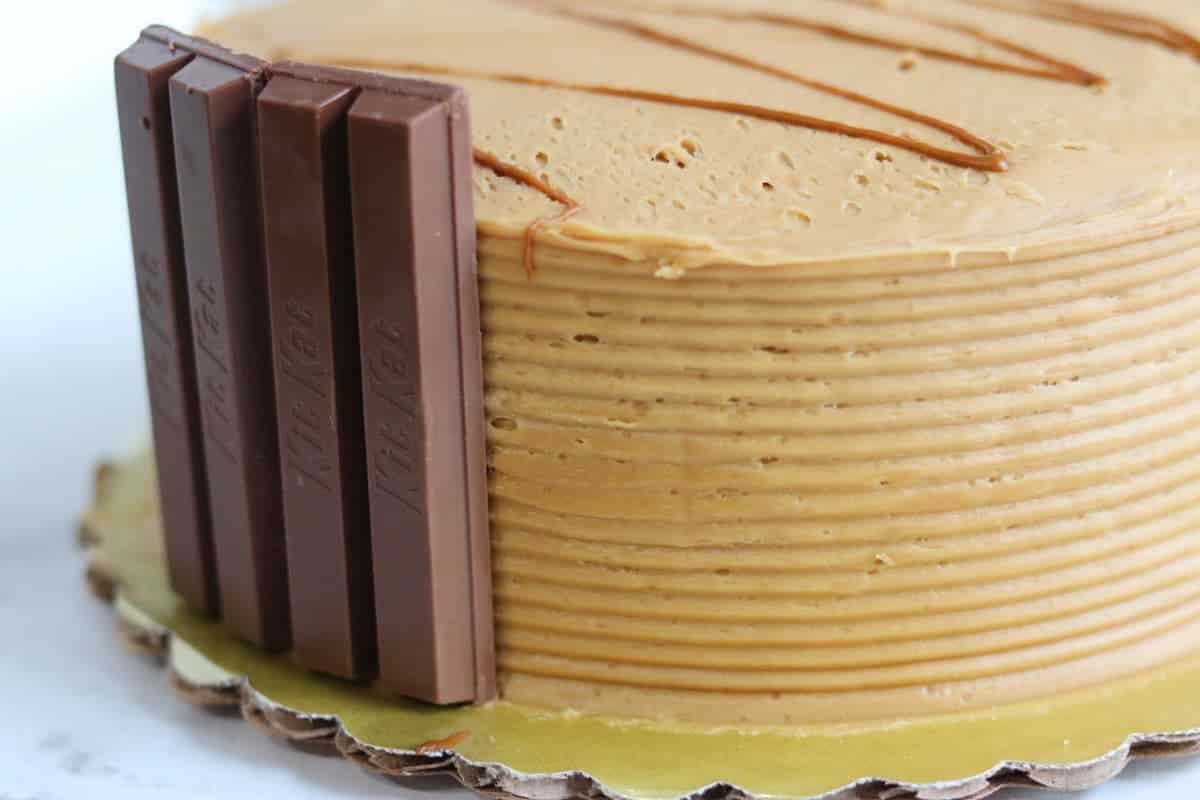
- Buttercream frosting. Thick buttercream works best so the Kit Kats stick. If your frosting is soft, chill the cake before wrapping.
- Kit Kat candy bars. Standard packs work best. You can use singles or pairs, just keep the spacing tight.
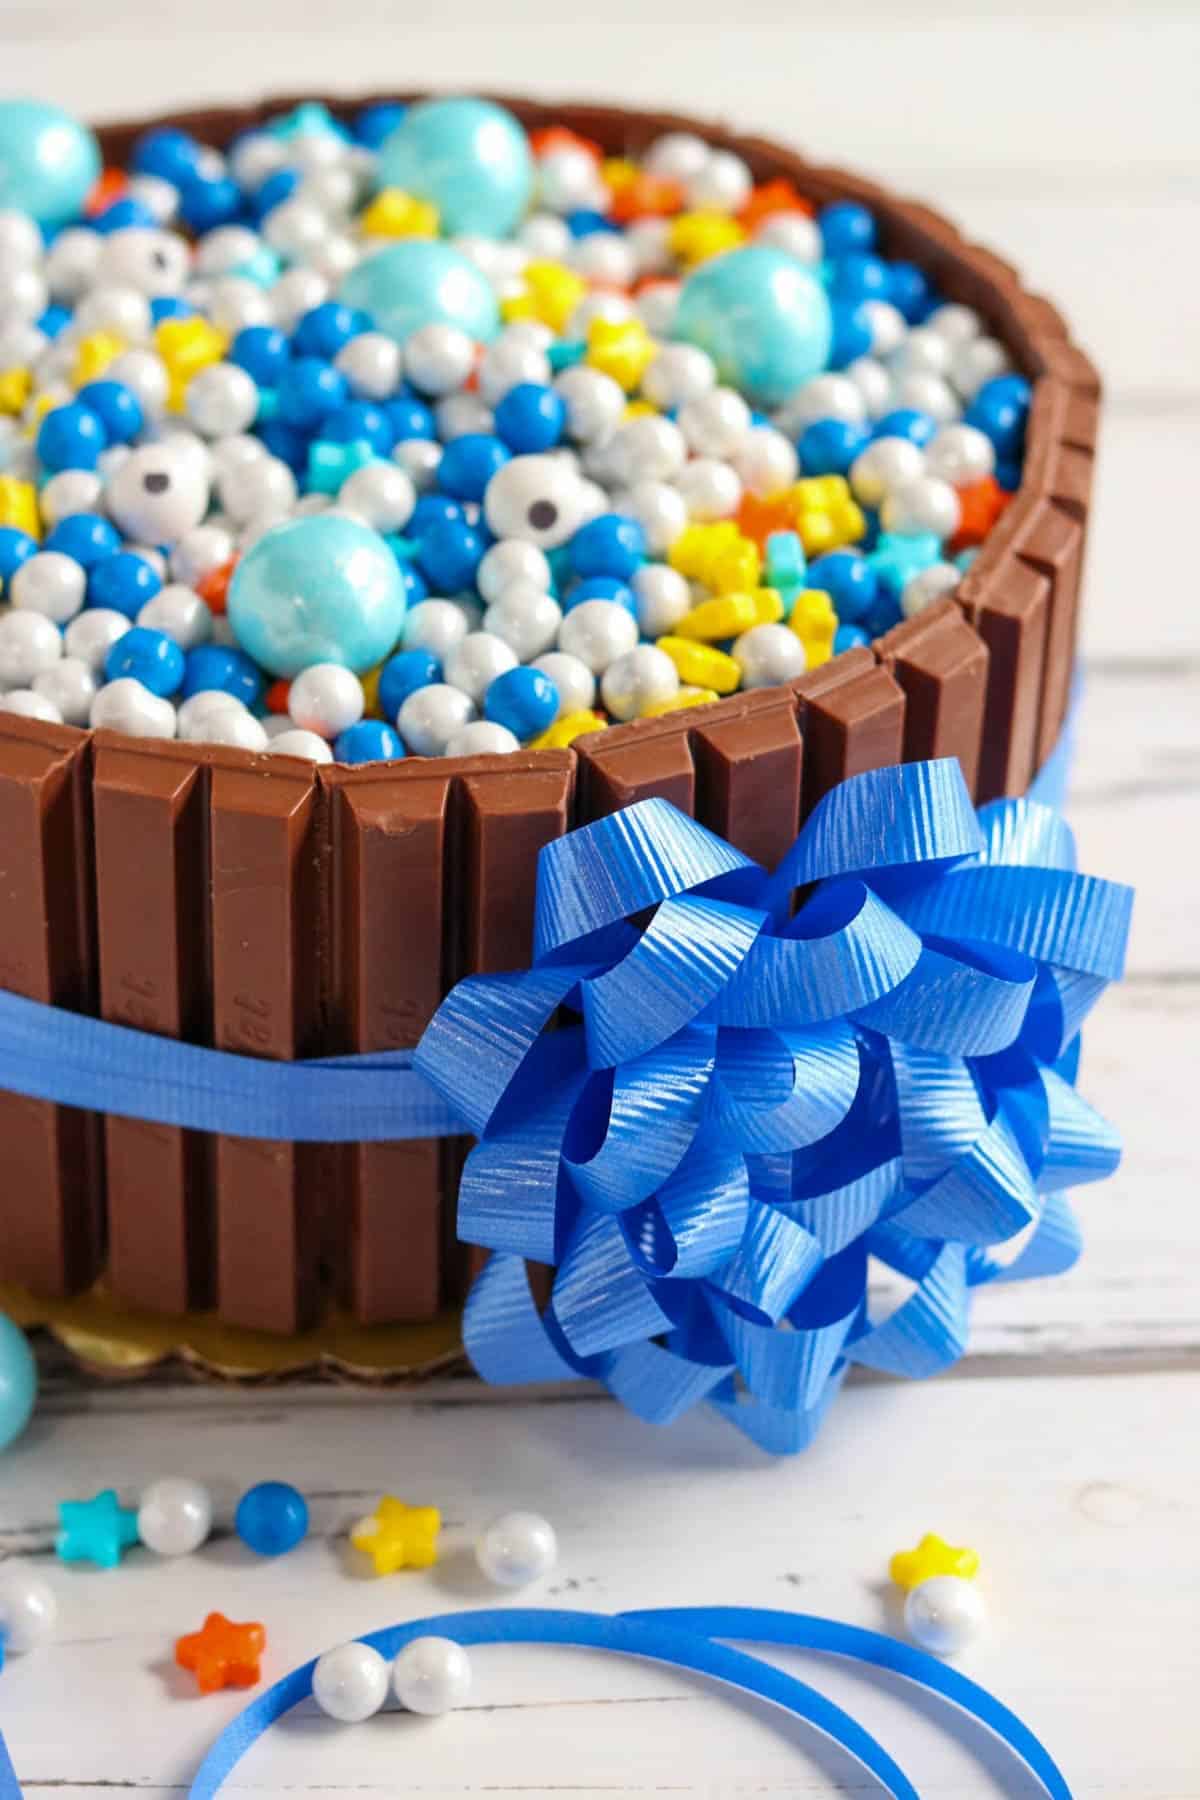
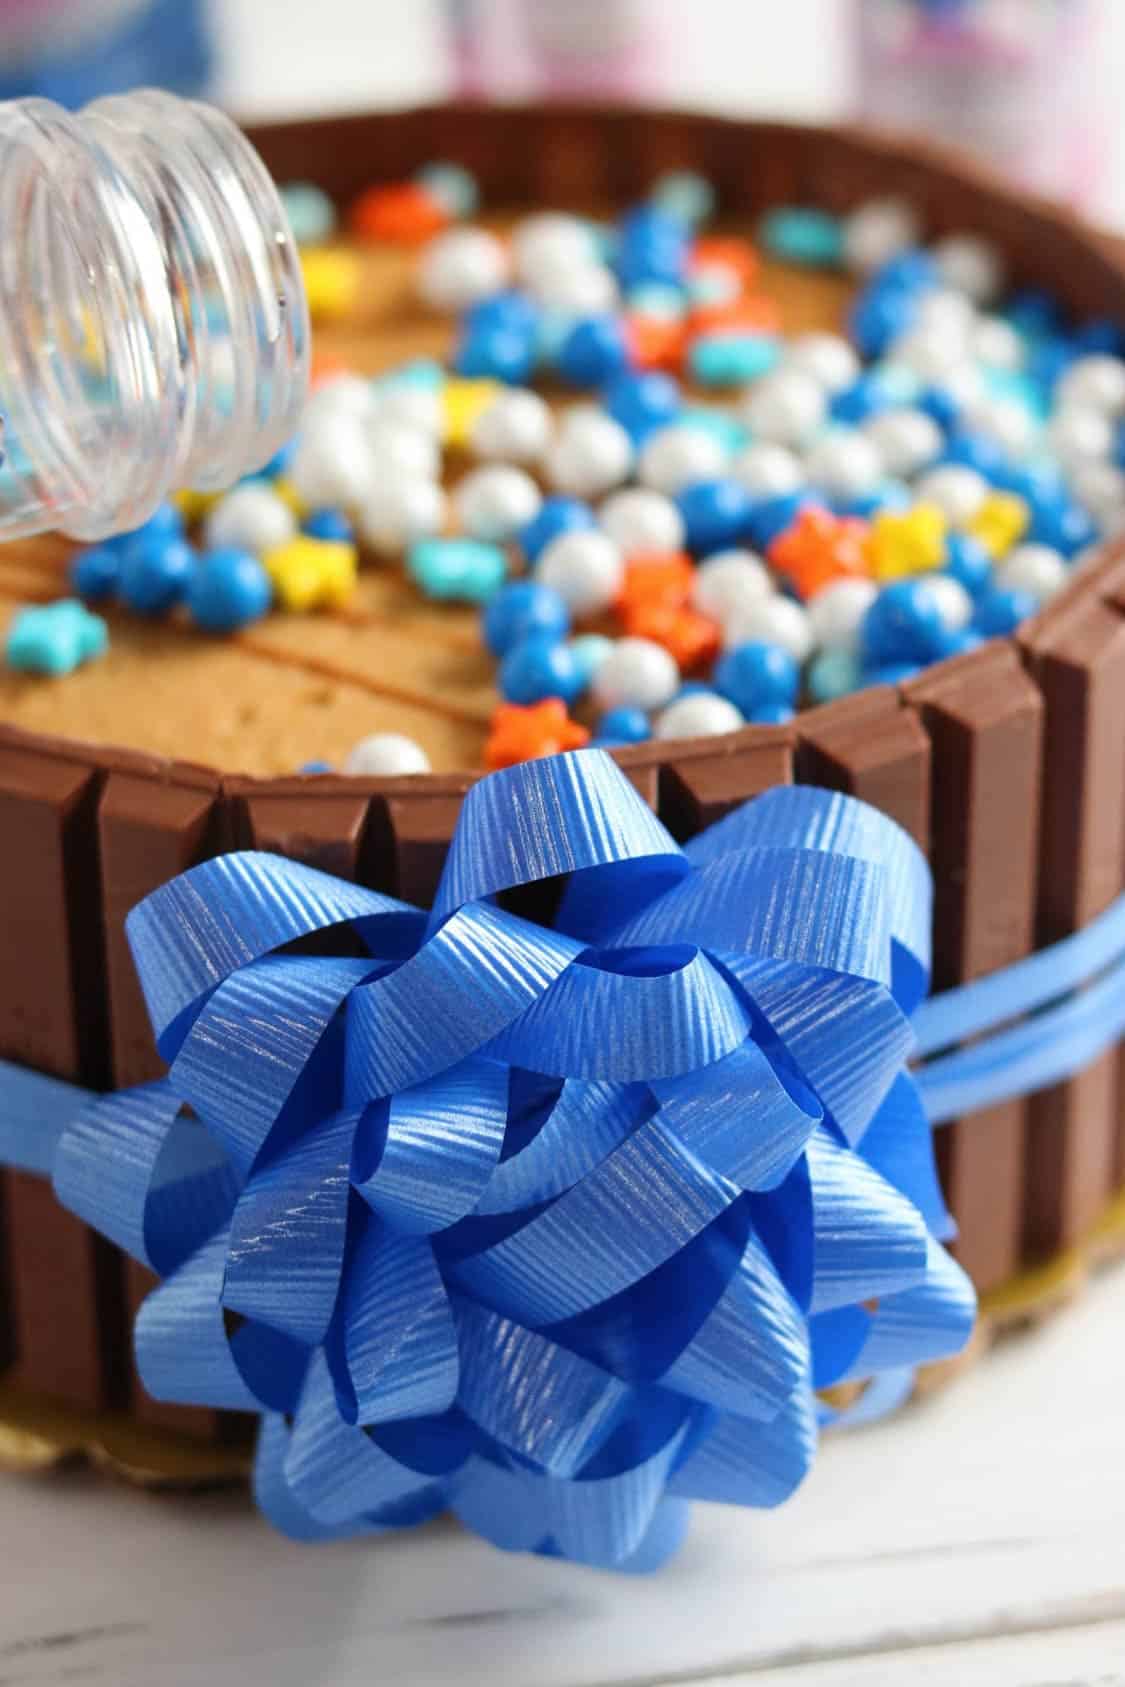
- Colored candy. M&M’s, sixlets, mini eggs, or any small candy works. Match the colors to your theme. You could also use fresh strawberries and drizzle chocolate over them for a Valentine’s day version!
- Ribbon. Optional, but it helps hold the Kit Kats in place and makes the cake look finished. Pick a color to match your theme
How to make this recipe
This is a step-by-step photo guide. Full ingredients and instructions are in the printable recipe card below.
JumpWould you like to save this recipe?
Get prepped. If using a store-bought frosted cake, remove the plastic lid and make sure the frosting is smooth and evenly covering the sides. If using a homemade cake, bake your 9-inch round cake, let it cool completely, then frost the top and sides with a thick layer of buttercream before continuing. If the frosting feels soft or your kitchen is warm, place the frosted cake in the refrigerator for 15 to 20 minutes. The frosting should feel slightly firm to the touch before adding the Kit Kats.
Prepare the Kit Kats. Unwrap the bars and separate them into single fingers or pairs. Keep them aligned so they sit evenly against the cake.
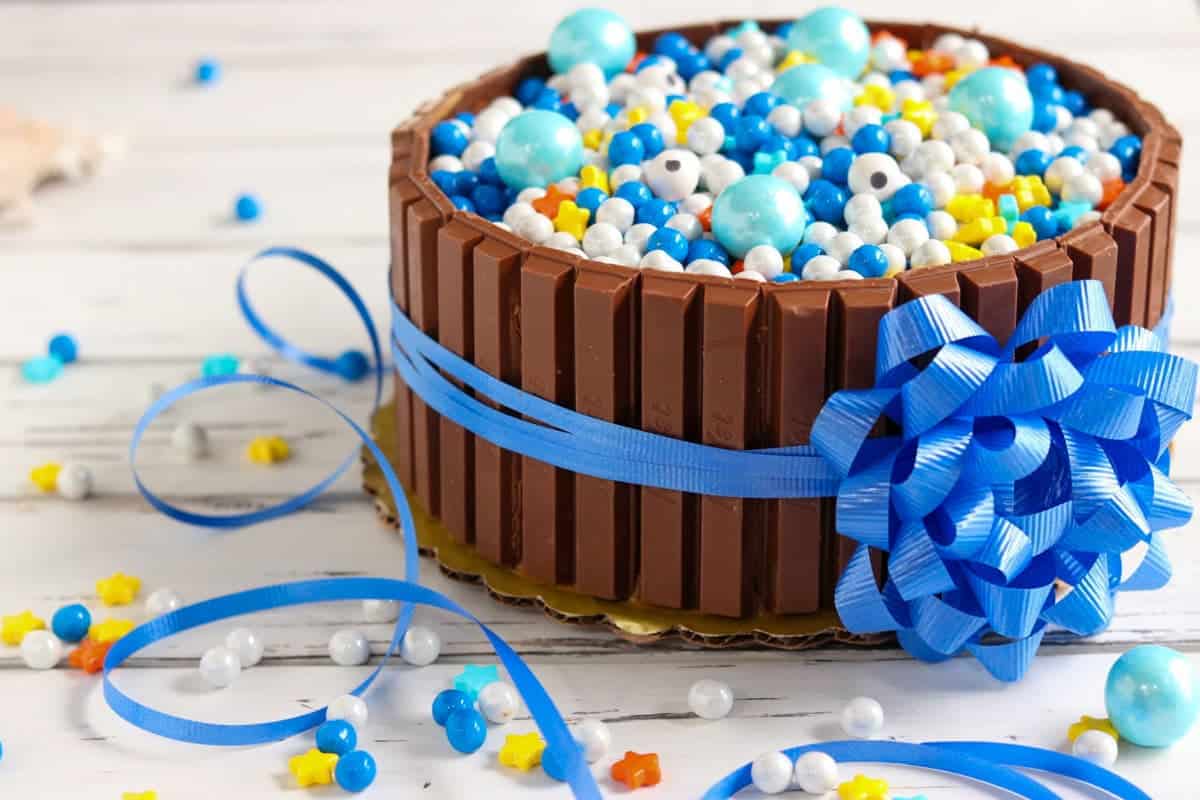
Attach the Kit Kats. Starting at the back of the cake, press each Kit Kat gently but firmly into the frosting. Work your way around the cake until the entire outside edge is covered. The bars should sit snug against one another with no large gaps.
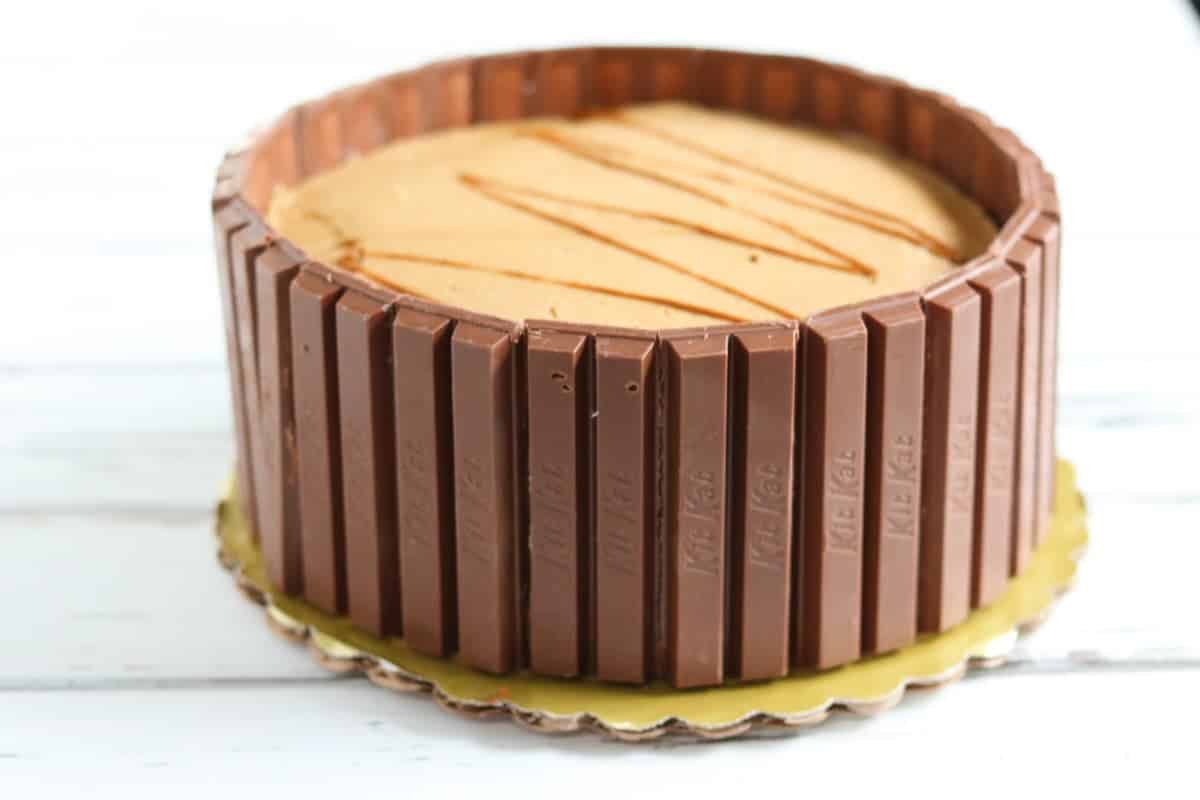
Tie the ribbon. Wrap ribbon around the entire cake and tie in a bow. This helps hold everything in place and hides the seam where the first and last Kit Kats meet.
Fill the top. Pour the colored candy into the center of the cake and spread it out evenly. The top should be fully covered but not piled so high that it spills over the sides.
How many Kit Kats do I need for a 9-inch cake?
Most 9-inch cakes take about 30 to 40 Kit Kat fingers, which is usually around 5 standard packages.
Can I use other candy bars instead of Kit Kats?
Yes, but Kit Kats are easiest because they are flat and stack neatly.
How do I cut it without cracking the bars?
Use a sharp knife and cut between the Kit Kats.
Can I use a square cake instead?
Yes, but you will need more Kit Kats and you may need to trim pieces to fit corners.
Troubleshooting
- Kit Kats sliding. Your frosting is too soft. Chill the frosted cake for 15 to 20 minutes, then press the Kit Kats back into place.
- Gap at the end. Use a single Kit Kat finger to fill the space and position that seam at the back under the ribbon bow.
- Messy slices. Use a sharp knife and cut between the Kit Kats instead of straight through them. Wipe the knife between cuts for cleaner slices.
- Ribbon slipping. Tie the ribbon tighter or secure it discreetly underneath with a small piece of tape where it will not show.
Kylee’s Notes
- If your buttercream is soft or your kitchen is warm, chill the frosted cake for 15 to 20 minutes before adding the Kit Kats. This makes a huge difference in how well they stick.
- Use a thick buttercream, not a light whipped frosting. You want the frosting to act like glue, not a fluffy cloud that slides around.
- Start placing the Kit Kats at the back of the cake so the final seam is hidden under the ribbon bow. If you need to use a single finger to fill a small gap, put it there too.
- When it is time to slice, aim your knife between the Kit Kats instead of straight through them. You will get cleaner slices and fewer chocolate-bar casualties.
- If you are transporting this cake, keep it chilled until you arrive. Let it sit at room temperature for 30 to 45 minutes before serving so the chocolate is easier to bite and slice.
How to store leftovers
Store covered in an airtight container at room temperature for up to 2 days.
Refrigerator
If your kitchen is very warm or you prefer a firmer cake, refrigerate in an airtight container for up to 4 days. Let the cake sit at room temperature for 30 to 45 minutes before serving so the chocolate softens slightly.
Get free recipes in your inbox!
Find me on Pinterest, Facebook & Instagram.
If you make this recipe, please comment and let me know how it turned out and leave a star rating! ⭐⭐⭐⭐⭐

How to make a KitKat Cake
Ingredients
- 1 9- inch round cake baked and fully cooled
- 5 packages packages Kit Kat bars
- 1 cup colored candy M&M’s, Sixlets, mini eggs, etc.
- ribbon optional
Instructions
- Get prepped. Make sure your cake is completely cooled. If using store-bought frosting, stir it until smooth and spreadable. If your frosting feels soft, chill the cake for 20 minutes after frosting so the Kit Kats adhere better.
- If using homemade cake: Spread a thick, even layer of buttercream around the sides and top of the cake. The frosting should be thick enough to act as glue for the candy bars.
- Prepare the Kit Kats. Break the bars into individual fingers or pairs, keeping them aligned for easier placement.
- Attach the bars. Press the Kit Kat pieces gently but firmly into the frosting around the entire outside of the cake, working your way around until fully covered.
- Secure with ribbon. Wrap ribbon around the cake and tie in a bow. This step is optional but helps hold everything snug.
- Fill the top. Pour the colored candy into the center of the cake and spread evenly.
- Slice and serve. Use a sharp knife and cut between the chocolate bars for cleaner slices.
Notes
- Chill the frosted cake for 15 minutes if your frosting feels soft.
- Use a thick buttercream, not whipped frosting.
- Start placing Kit Kats at the back so the seam hides under the bow.
- Cut between the Kit Kats for cleaner slices.
- Buy one extra package of Kit Kats just in case.
Would you like to save this recipe?
Nutrition
Nutritional information is an estimate and provided to you as a courtesy. You should calculate the nutritional information with the actual ingredients used in your recipe using your preferred nutrition calculator.
Did you make this recipe?
Make sure to follow @kyleecooks on Instagram for more and tag me #kyleecooks so I can see!
About Kylee Ayotte
I am a born and raised New Zealander (a Kiwi), now living in Phoenix, Arizona. I’m happily married to the love of my life – a hot American boy I met while traveling the world. I’m a mama to 2 awesome little boys and love red things, rugby, cheesecake, and bacon. Mmmmm. Bacon. Meet Kylee